Showing posts with label Chocolate. Show all posts

Saturday, April 13, 2013

L.A. Burdick Chocolate - Back Bay

Today I am so excited to share one of my recent finds in Back Bay - the L.A. Burdick Chocolate shop on Clarendon Street!  I've walked by this place a million times and always thought it was a weird little tourist stop or something (no reason to think that, it was just in my head)...I was completely wrong, this place is exceptional.  If you're local, you may recognize the unique facade that differentiates this little shop from pretty much everything else in the neighborhood.


Famous for premium confections and bonbons, one of the signature items at L.A. Burdick are their little chocolate mice; they don't use molds to make these!  I will definitely be back to purchase a box of mice as my next hostess gift, they are just too cute.


The shop isn't too big, which keeps the inside cozy and cafe-like.  There are aisles of chocolate goods to buy, as well as a small dining section with tables to sit and enjoy a coffee and a snack at.   I would definitely choose this spot for an afternoon of reading over Starbucks! 
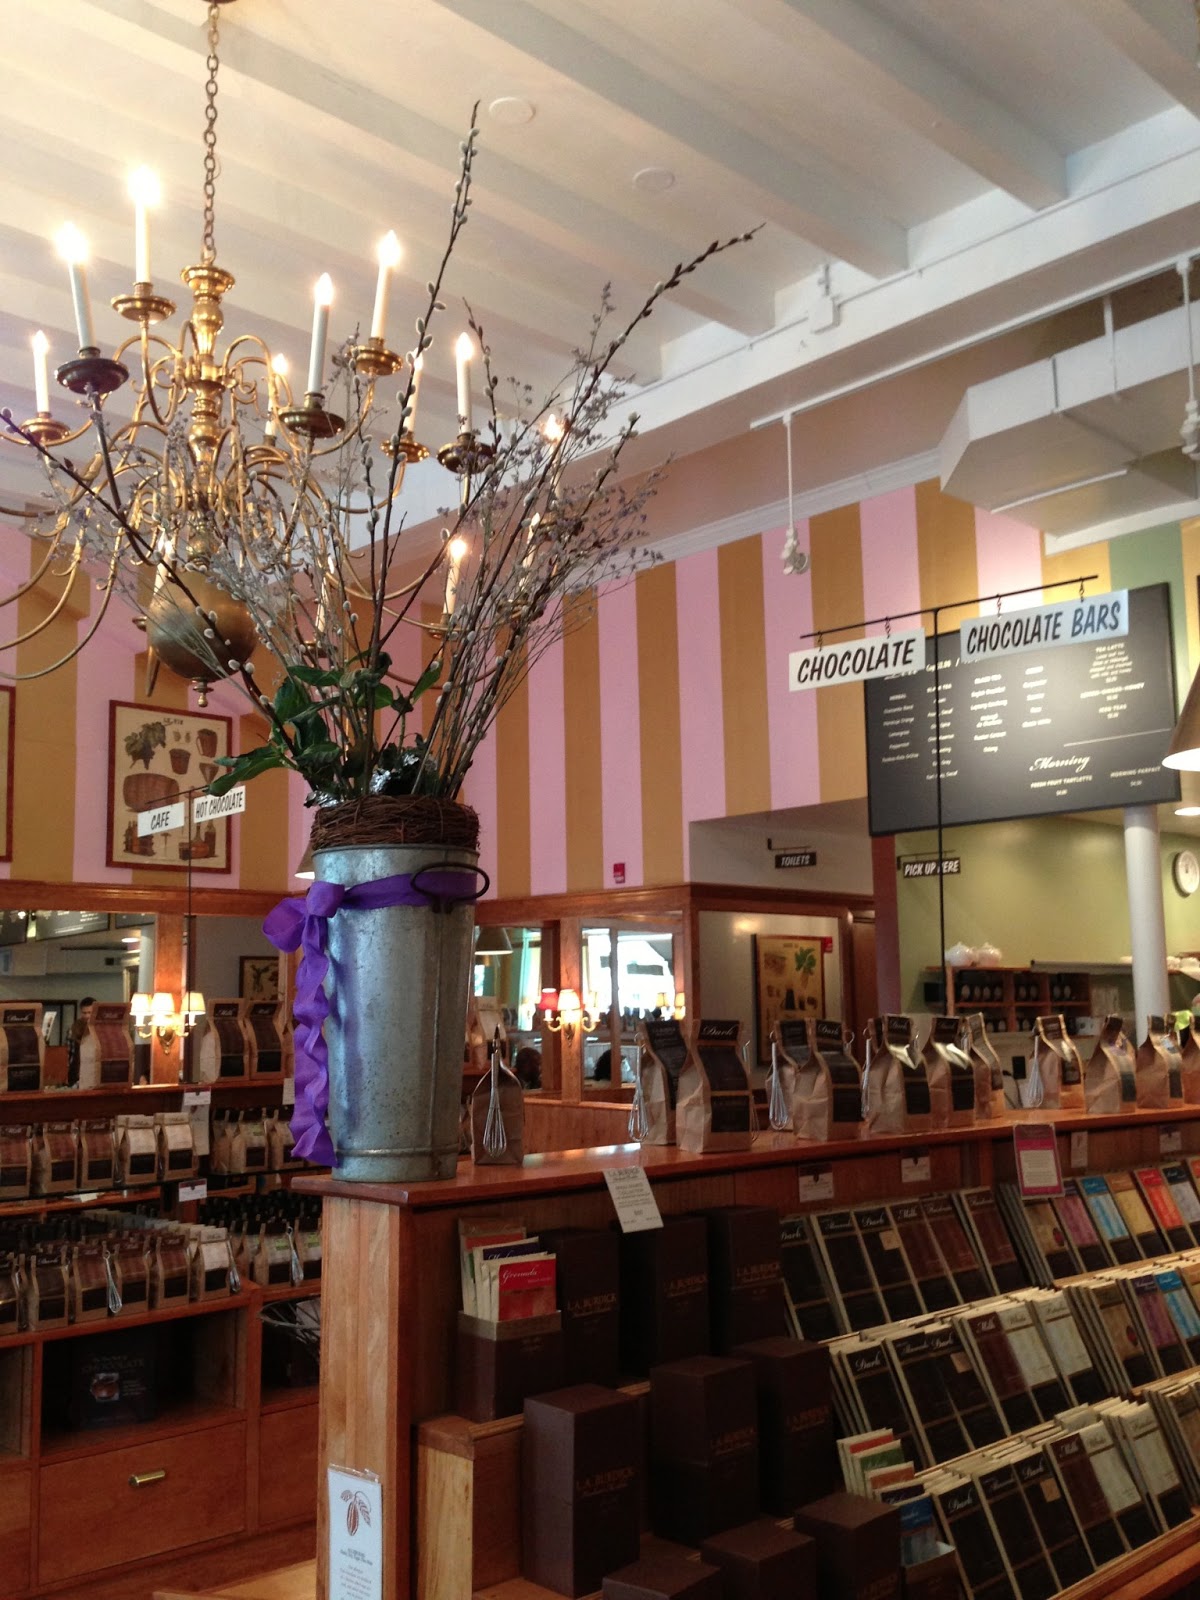


We had just come from brunch at the Met on Newbury Street (which was also great, by the way!), so didn't have much room to taste lots of sweets, but we did get a little range of tastes by trying a Mocha, a Caramel Latte and three French Macarons in Raspberry, Coffee and Peach. 


The macarons were great, tasted just as we would have expected them to and I couldn't help but admire the perfect "feet" on all of them.  The caramel latte was phenomenal, I think because they use a house-made caramel that was so buttery and delicious.  The real winner, though, was the mocha.  Jake requested a milk chocolate mocha (you can choose milk, dark, or white chocolate), and we both were absolutely blown away.  It was like drinking pure liquid chocolate with a hint of espresso.  It was much closer to a hot chocolate than a typical mocha coffee drink, but we were certainly not disappointed.  This is the official description of the mocha:  Milk chocolate mixed with steamed milk and poured into a double shot of espresso, finished with a foam and grated spice ball. 


One of the best parts of the shop is the variety of chocolate goods you can purchase, in addition to the typical truffles you would expect.  They had everything from chocolate powder, chocolate bars and chips, to cocoa pods and chocolate cigars.  I was in awe and was very serious when I said I will be going here for my next hostess gift!


We were both very happy with our little stop in to L.A. Burdick, and will be back soon!

Saturday, February 2, 2013

The Best Cupcake Ever

I have a confession.  I call myself a "Sweetie" (rather than a foodie), and up until this week, I have never had a Crumbs cupcake.  I don't know how it never happened...it just didn't.

Until this week, that is!  I woke up and was having a bad morning.  It was day 3 of a mild, lingering headache, and one of the cats puked on my Ugg boot.  I was running late and dying for coffee and was basically a huge grump.  I was cutting through the back way of the Pru hoping to stop at Dunkin Donuts for a coffee, and on my way, saw this...


It was like I found Oz!  All of a sudden my grouchiness just melted away and I circled the booth grinning like a schoolgirl at 8:30 in the morning.  As I browsed the selection of massive cupcakes, I spotted my breakfast- Caramel Latte Cupcake.


I picked up three of these chocolate cake, espresso cream-filled, caramel and white chocolate-topped hunks of heaven and headed to the office.  My team and I started off what I coined as "Happy happy fat fat day" on the right foot (even though poor Steph could only eat the frosting, forgot to look for a gluten-free option!) with lots of sugar.  After a few bites in, I was in love...and after a few more bites when I found the espresso cream filling, I was obsessed.  This truly was the best cupcake I've EVER had, and I am psyched and scared that Crumbs is now just right across the street from my office.


What's your favorite Crumbs flavor?  I'll need a list for next time!

PS - how cute are these cake pops?  They're like cake push-up pops...Must grab one next time!

Friday, December 21, 2012

Chocolate Rum Balls

"Hey Kid, do you like rum?"

"What's rum?  Rumplestilskin??"

Does anyone else love Big Daddy as much as I do?  So funny.  I can't have rum without quoting that line.


Anyway, tonight's cookie is something new to me- rum balls!  These were recommended by my husband's coworker.  They're an awesome no-bake, extremely rummy (har har) treat.  The dough is a cinch to put together, the rolling takes a bit more time.  These would be a hit for any chocolate and rum fans.  Like me. love love love.  Warning, despite only using 1/4 cup of alcohol, these definitely have a kick and should be enjoyed by adults only.

Here's the recipe:

Crush up 1 box of Nilla Wafer cookies, and put them in a large bowl.  Then, add the following ingredients and mix well:

  • 2 tablespoons of cocoa 
  • 1 cup of chopped walnuts
  • 1 cup of confectioner's sugar
  • 4 tablespoons of honey
  • 1/4 cup of rum
All you have to do now is roll the dough into bite-sized balls, and if you prefer, coat them in extra confectioner's sugar like I did.  I put mine in the fridge to firm up, and these can be frozen as well.  They are fine at room temperature if you don't have space in the fridge. 

Let me know in the comments below if you have your own version of Rum Ball cookies- I'd love to try some other recipes for these!


Wednesday, December 19, 2012

Mint-stuffed Sugar Cookies

Tonight's cookie is a little "semi-homemade" treat that I'm brining to my sister's graduation party tomorrow night.  I am so proud of her and all I can think about is how my little sister is a nurse! I had a lot to do tonight and not too much time to get creative, so I did a spin-off of a recent recipe I saw on Pinterest.


These cookies are just store-bought sugar cookie dough and junior mints with sprinkles.  That. is. it.  They taste great too, I love the combination of vanilla, chocolate and peppermint.  Tasty and festive and pretty to look at, too!


I had to do some experimenting with the baking times and for me the trick was 7 and a half minutes (yes, 7 was too short and 8 was too long) at 325 degrees.  

Besides Junior Mints, you could probably stick any mini-candy in the middle of these and they'd come out good.


Have a good week, Sweets!

Need:
1 log of store-bought sugar cookie dough
2 boxes of Junior Mints

Do:  
1.  Preheat oven to 325F.
2.  Cut the log into 1/2" slices, and quarter each slice
3.  Flatten one of the dough corners in your hand, place a candy in the middle, and roll the dough around it into a ball
4.  Dip the cookie ball into sprinkles 
5.  Bake a cookie sheet for 7 minutes.  If they seem too soft, try another 30 seconds to a full minute.


Sunday, December 16, 2012

Thin Mint Gooey Cake Bars

Hi Sweets, guess what?  I'm baaaack!  I hope you enjoyed the posts from Cheryl and my Jake the past few days!  "B-hubs" as he likes to call him has really been on a baking roll lately, I love it!


Tonight I am excited to share a brand new recipe with you - Thin Mint Gooey Cake Bars!  Yes, I took cookies that are pretty amazing and made an even BETTER cookie, by adding chocolate, Andes candies, and my favorite, cake!

This recipe (and the Thin Mints I used) were shared with me by the Girl Scouts of Eastern MA.  I was so excited to try out the bar cookies to bring to a family Christmas dinner tonight, and they were a hit! The title of "bars" makes you think of brownie-sized bars.  Word to the wise; quarter those squares!  This recipe turns out super delicious, but super SUPER rich.  Like, way too rich for even the biggest sweet lover to eat a whole square.  When cut up into bite-size mini squares, it's the perfect cookie-size portion.

The title tells it all- there's plenty of minty chocolate and lots of delicious (and surprisingly un-messy) 'gooey' atop a buttery yellow cake crust. So good!

The best part is that one of the ingredients you need to make these cookie bars is the Thin Mint cookies themselves.  Now that it's officially Girl Scout cookie time, it's perfect timing to try these out for a holiday gathering.  Cookies are available December 7th through March 12, so keep an eye out for your local Girl Scouts getting their sell on!


When I was a "brownie" and a "junior" Girl Scout, I was always a top seller and had so much fun selling cookies for my Girl Scout troop.  This has been an American tradition for nearly 100 years and all of the proceeds help girls learn important skills while raising funds for leadership activities.  The money helps Girl Scout troops take part in service projects, go on field trips, attend summer camp, etc.  I LOVED Girl Scout camp- who remembers the Squirmy the worm song?!  One thing I learned through working with the Girl Scouts on this recipe is about their Cookies for a Cause program.  Part of the cookie-selling process allows girls to sell boxes of cookies that are put aside to be donated to soldiers overseas or to local food pantries.  What an awesome way to use this well-known project for good.

Girl Scout cookies are $4 a box, and you can visit www.hergirlscouts.com, click on "cookie locator" and enter your zip code to find out where you can buy cookies in your area.

Here's the recipe for Thin Mint Gooey Cake Bars.  Comment below if you try these or have other Girl Scout cookie-inspired recipes!

Need:
1 Yellow Cake Mix
1 stick of softened unsalted butter
1 large egg
1 cup chocolate chips
1 cup Andes Candy mint pieces
1 small can sweetened condensed milk
20 Girl Scout Thin Mint cookies broken into pieces

Do: 
Preheat oven to 350F and coat a 9x13" baking dish with non-stick cooking spray (I always use canola oil spray).

Mix cake mix, butter and egg in a large bowl.  Press dough into the bottom of the prepared baking dish.  Top evenly with chocolate chips and Andes candies.  Pour condensed milk over dough and top with broken pieces of Thin Mint cookies.

Bake for 30-35 minutes until baked through.  Let cool completely.  Cut into squares and serve.

Pat dough in pan
Add chocolate chips
Add Andes candies
Pour on condensed milk
Top with cookie crumbles!
Bake and enjoy!
Disclaimer:  This is a (semi) sponsored post.   The Girl Scouts reached out to me asking if I would be willing to try out and feature a fun new recipe using Girl Scout cookies if they sent me the cookies for free.  I happily agreed, being a Girl Scout alum and cookie lover!  The only benefit I got for this post was the box of free cookies (and fun new recipe.)  All other supplies were purchased by me, and the honest opinions expressed in this post are all my own.

Thursday, December 13, 2012

Peanut Butter Blossoms - Guest Post!

Today's guest post is written by my good friend Cheryl.  Cheryl was actually my boss for three years at my very first job out of college, and we've kept in touch since then.  We have the most fun going on weekend adventures and girls nights out - she is wild and crazy fun, not to mention very talented in the kitchen!  Thanks for sharing your family recipe, Cheryl!!

---


When I was a little girl my Grandma Webster made Peanut Butter Blossoms every Christmas, and we had them in our home during the holidays as well. My mom adopted the recipe long before I was born as one of four cookies she made annually at Christmas time.

My grandmother baked for a living, or I should say for extra money when my grandfather retired. Everything she made was deliciously moist and she never needed a recipe. She had all her recipes memorized!

I secretly think she started selling her baked goods because it allowed her time away from grandpa when he retired. Mind you, she did all her baking out of her home so she never truly got away from him, in fact he began helping her when orders started to climb and she couldn't keep up. It grew a wonderful business and partnership between the two of them.

Often during the holiday season when orders grew my mom would spend the day helping out. My siblings and I of course came along for the ride. The smells in their home were divine.

For this reason, I continue the tradition today to keep those memories alive. Instead of with my grandmother, I now share this tradition with my husband Mike.

Need:
1 cup of peanut butter (Jiff works best)
1 cup sugar
1 cup of brown sugar
1 cup of Butter
2 eggs
4 tbsp of milk
2 tsp vanilla extract
2 3/4 cup of flour
2 tsp baking powder
1 tsp of salt

Do:
Mix butter, peanut butter, and sugars until mixed together and batter is uniform. Then add eggs, milk and vanilla. Then add dry ingredients to a medium size bowl - blend them and slowly add this flour mixture to the butter/sugar mixture.

Refrigerate for one hour or overnight or even better results. Pre-heat oven to 375 degrees F. Bake on non- greased baking sheets 8-9 minutes. Remove from sheet immediately and add kisses or peanut butter cups while cookies are still hot, this way the chocolate melts into the cookie. Makes 75 cookies.

Monday, December 10, 2012

Chocolate Cranberry Oatmeal Cookies

After a full week of having cookies every single day, I guess it's to be expected that I'd have a "fat" day around now.  Ever felt that way?  I battled it by doing a killer spin class at the gym tonight, making a dinner found on one of my favorite blogs (Skinnytaste.com) and then choosing a recipe from WeightWatchers.com for tonight's cookie.  It's healthy, see?!

Look at all those oats!!

Well, actually, it's not that healthy.  There's tons of sugar and a stick and a half of butter, but that's what makes cookies so delicious.  The main ingredient is oats, and oats fill you up, so at least you will eat less cookies before feeling totally satisfied.

What I love about this recipe is the cocoa mixed into the flour portion.  It helps work on that chocolate craving without being packed with chocolate chips.  What I don't love about this recipe is how much the dough expands when you bake them.  They spread waaaaaay out, so space out your dough accordingly.


Check out the original recipe here.  I swapped Craisins for dried cranberries and love the final cookie.  It's a thin, chewy, delicious and healthy-tasting treat, perfect for a feeling-fat-Monday.

Have a great week, Sweets!

Friday, December 7, 2012

Soft & Chewy Chocolate Drops with Hot Cocoa Frosting - Guest Post!


Today's post is written by my good friend Heather.  Heather and I were coworkers at my first "real" job, and then neighbors for two years.  Heather is a die-hard-"Michigander" (Go Blue!) and is an excellent running buddy.  She also makes the BEST Heath Bar Angel Food cake you will ever eat, so hopefully I will get her to share that one day, too.  I happen to know that Heather brought these into work and they were a huge hit.  One coworker who avoids butter like the plague couldn't even resist!  Thank you for sharing your cookies, Heather!!

---

Double-chocolate soft & chewy cookies


I've been craving a chocolate cookie and had one in mind that my mom made once years ago.  She couldn't find the recipe so I used the one on the back of the Bakers Unsweetened baking chocolate box.  You will need:

4 squares Bakers' Unsweetened Chocolate
3/4 cup butter (1.5 sticks)
2 cups sugar
3 eggs
1 tsp vanilla
2.5 cups flour

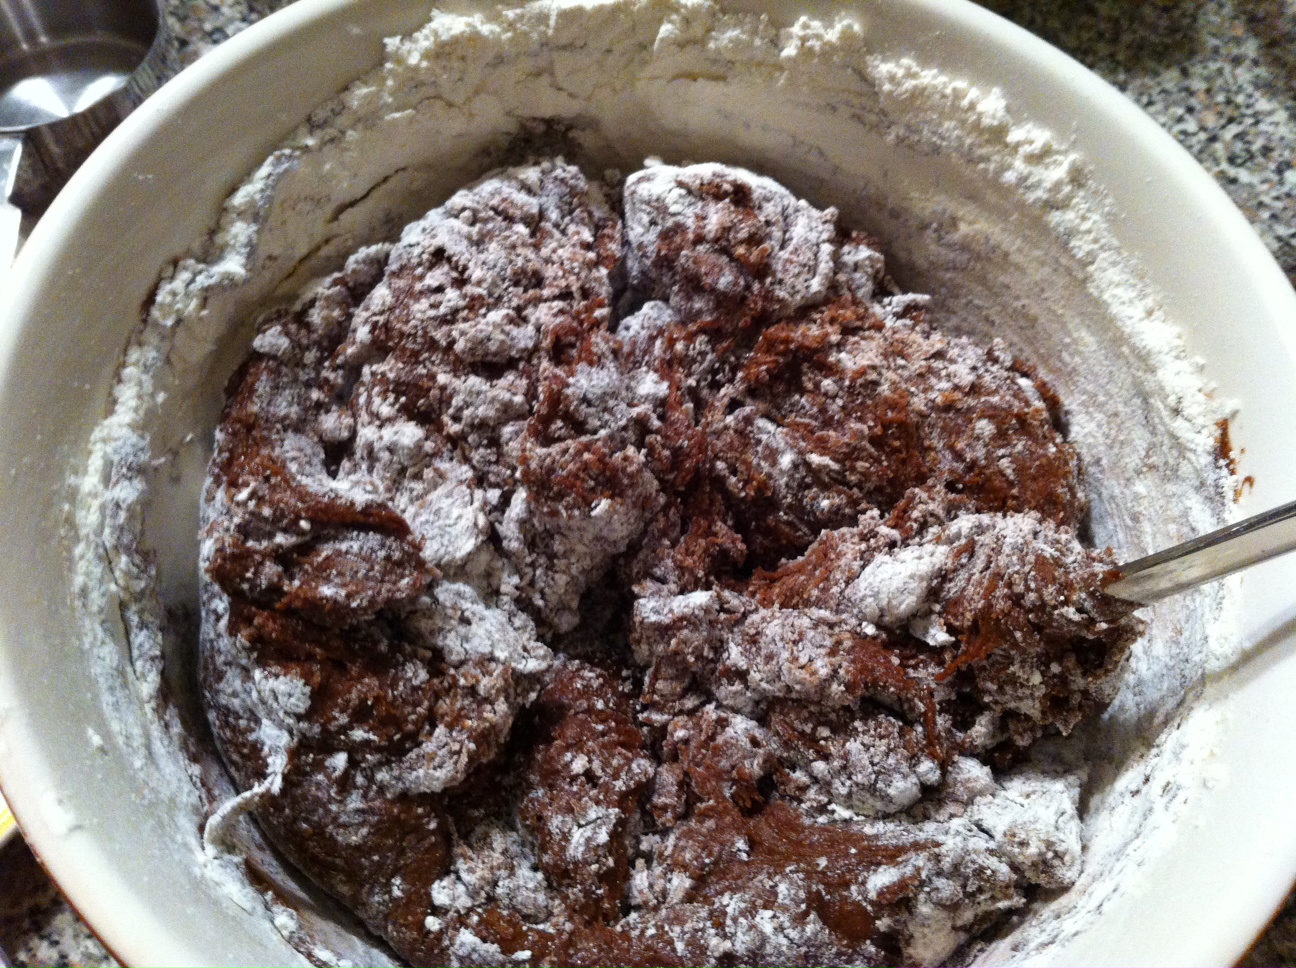
Dough with flour added
Heat oven to 350F.  Microwave unsweetened chocolate and butter in large bowl on high for 2 minutes (or until butter is melted - mine took more like 3 minutes).  Stir until chocolate is completely melted.  Add sugar and mix well.  Blend in eggs and vanilla.  Stir in flour.  (Do not over mix).  Refrigerate 1 hour or until dough is easy to handle.  (I was impatient and just refrigerated for 20-30 minutes.)

Shape into 1-inch balls (highly recommended - they keep their shape so just dropping them on the baking sheet makes them look yucky - too ugly to take to work!)

Balls of cookie dough
Bake 8 minutes or just until set (I let mine bake for 10 - they didn't look done after 8 minutes).  Let stand on baking sheet for 1 minute (if you don't wait the bottom falls out - at least that's what happened to me!  I'm going to fill it with frosting.)  Transfer to wire rack to cool completely.  This yields 5 dozen cookies (I got 61).

Baked cookies
Frosting!

I planned on using the recipe on the back of Hershey's Unsweetened cocoa but didn't think I had enough powdered sugar so I used hot cocoa mix that's mostly powdered sugar.

Hot Cocoa Frosting

1/4 cup of butter (1/2 stick)
Splash of milk (I used roughly half of a 1/3 cup)
1 3/4 cups hot cocoa mix (see below for recipe)

Melt butter.  Add hot cocoa mix and milk.  I mixed with a fork and it was really lumpy so I brought out my mixer to smooth it out a bit.  Still wasn't super smooth (see below).  The taste makes up for the lumps! :)

Lumpy but delicious frosting
Cocoa Mix (makes a whole bunch!!)

11 oz. jar non-dairy creamer
3 cups plus a little powdered sugar
2 cups Nestle Quick
1 1/3 cups non-fat dry powdered milk (enough for a quart of "milk")

Mix all ingredients together and store in an air tight container.  (Use 4 heaping tablespoons per cup of boiling water for actual cocoa.)

Wednesday, December 5, 2012

Double Chocolate Mint Chip Chewies

Happy Hump Day, Sweets!

If you like Girl Scout Thin Mints, tonight's cookie is for you.  It's a fudgy, rich chocolate cookie studded with seasonal Mint M&M's.  Same flavor as Thin Mints, but less crunch and more chew.  De-lish.


In my latest trip to the food store, I just couldn't resist the sassy minty M&M on the baking endcap.  I mean, look at her! I had initially thought I'd do a plain sugar cookie and put the M&M's in those, similar to the Keebler kind my mom gave me growing up.  But then I thought about the sugar cookies we had last night and how I love chocolate and it dawned on me that it's a good idea to mix chocolate and mint.


I really love this chocolate cookie, and the red, green and white M&M's make them look so festive.  This is definitely another recipe on the favorites list for 2012 Christmas cookies.  If you make your own batch, let me know how they come out!


Side-note - the cookie dough for these is excellent too!  But don't eat too much; raw eggs are no good. 

Need:
1 1/4 c. unsalted butter
2 c. flour
1 c. brown sugar
3/4 c. white sugar
3/4 c. dutch process cocoa
2 tsp. vanilla
1 tsp. salt
2 large eggs 
1 tsp. baking soda
1 1/2 cups Mint M&Ms

Do:
  1. Preheat oven to 350F.
  2. In a small bowl, whisk cocoa, salt and baking soda to combine.  Put to the side.
  3. In a mixing bowl fitted with the beater attachment, cream the butter, brown sugar and white sugar until well mixed. 
  4. Add one egg, mix well, then add the other egg and continue to mix well.
  5. Add in vanilla, continue to mix.
  6. Pause the mixer, and add the cocoa/salt/baking soda mixture.  Start mixer on slow to combine, then beat well.
  7. Again, pause the mixer and add in the flour.  Start mixer on slow to combine, then beat well.
  8. Mix in M&M's by hand
  9. Using a 1-tbsp cookie scoop, portion out the cookies onto a sheet lined with parchment paper.
  10. Bake for 9 minutes
  11. It would probably be a good idea to cool these on a cooling rack, but since I don't have one, I just put them immediately on a plate.  Enjoy!


Sunday, August 12, 2012

Great Wall of Chocolate

Last week I was traveling for work and my client took us to dinner at PF Changs. After a delicious and healthy of grilled mahi mahi, steamed broccoli and brown rice, I was treated to...

The Great Wall of Chocolate! This was a little slice of heaven, and worth saving up the calories for! As someone who is overly particular about cake, I can say with confidence that this cake was GOOD. Moist, purely chocolatey and really, just a perfect dessert. Next one you're a PF Changs, go for the Great Wall. If you don't have anyone to share with, they have a mini version, too :)

Saturday, June 30, 2012

Brooklyn Brewery Food Experiment Tour: Cake in Boston

When my friend Neil (aka Chef Diesel) wrote and told me about Brooklyn Brewery's cake competition, I knew I had robe a part of it. No rules, just bake the best cake you can and go out for some fun. I love fun! And cake ;)


The competition was this past Sunday, and it was a blast. My sous chef (husband, haha) and I went for a "cake tasting" theme and brought wine cake bites; Chocolate Pinot Noir and White Riesling. Each had wine flavored buttercream to match. It took a full week of recipe testing and tweaking to get them right but in the end the testing paid off and I brought some pretty tasty little cakes if I do say so myself. Lots of the folks that stopped by the table seemed to love them and came back for seconds and thirds, and I got asked quite a few times if I have a bakery and if I take orders. (No storefront yet, but yes I do take orders!)
White Riesling Cake Bites
Chocolate Pinot Noir Cake Bites
We were Team #1! (sadly didn't win #1, hah!)
Sadly my little cake bites weren't deemed a winner, and neither were the prize-worthy Kahlua Cakes of Neil or the Chocolate Stout Cake Cookies with a Kick by my friend Jamie. Next year we really need to get the masses out to vote for us. The people who recruited tons of friends to show up won the fan-voted prizes by a landslide, but we're over it.. ;) Seriously though, it was a great and I'm so glad I participated.

Chef Diesel
Jamie & Jon
Sous Chef! 
I wasn't being a good blogger and didn't even check out all the tables because I was having fun chatting with everyone that came to mine, but some of the other cakes I saw at the event were:
  • Goat cheese cheesecakes with cherry port savory topping (these won the grand prize. I really liked it!) 
  • Cheesecake with ritz crackers? (another winner.. Didn't taste these) 
  • Some sort of spam pineapple cake (no way would I ever eat spam...J tried one and thought it was bacon. I think he liked it) 
  • Sangria cake (didn't try) 
  • Tequila Sunrise cake (wasn't a fan) 
  • Banana Cake (didn't try) 
The Food Experiment Tour goes nationwide with different themes in each city. If you're not in Boston, checkout their site because the tour could be heading your way! I heard that next years theme for Boston will be something savory, so my thinking cap is on. How can BostonSweetie go savory... I will find a way! I was being selfish and only took pictures of my own table, so those are here. Sorry for the poor quality, it was insanely dark in there! If youre dying for more, check out more at the Food Experiment's Flickr site, they came out great. Last thing- if anyone is interested in the recipe for the wine cakes, let me know in the comments below and I'll be happy to post. BostonSweetie, over and out.