Showing posts with label Mini. Show all posts

Monday, February 11, 2013

Small Batch Baking - Mini Strawberry Cake

Happy Valentines Week, Sweets!

As Thursday quickly approaches, I wanted to share a treat for two that I tried out this weekend.  Mini-cake recipes are hard to come by, but perfect for Valentines Day when you and your sweetie want to share a little post-dinner bite.


This cake is completely from scratch and gets it's amazing strawberry flavor from a fresh strawberry puree.  It's frosted with a cream cheese meringue frosting which is an amazing pair.  The finished cake does take a little time; I made mine over two days and that worked out well.  The pink/strawberry theme makes it perfect for Valentines Day, but this cake would also be an excellent choice in the summer when strawberries are nice and fresh and in season.

Tastie!  Strawberry cake, strawberry cream filling, cream cheese meringue frosting...yup, this combo works!
I adapted this recipe from one I spotted on Pinterest, from Oven Love Blog.  That recipe makes a whole big cake, and mine makes a mini.  I had some serious trouble with the icing and getting it to come together, but the end result tasted great even though it didn't spread/set as nicely as I would have liked.

If you make one of these mini-cakes this week, tell me about it in the comments below!


Mini Strawberry Cake with Cream Cheese Meringue Buttercream

Need:

  • 12 - 14 very ripe strawberries
  • 1/8 cup milk (I used almond milk) at room temperature 
  • 3 large egg whites at room temperature 
  • 1/2 Tbsp vanilla extract 
  • 1 1/8 cup flour
  • 3/4 cup plus 1/8 cup sugar 
  • 2 tsp baking powder 
  • 1/2 tsp salt 
  • 6 Tbsp unsalted butter (1½ sticks), softened (not melted) 
  • Red food coloring (optional) 
Do:
  1.  Trim all the strawberries, slice and toss with a teaspoon of sugar, cover and let them sit at room temperature for an hour or two. 
  2. Place strawberries in a food processor and puree.
  3. Put a little bit more than 1/3 cup of the strawberry puree aside; this will flavor the cake.  The rest can be used for filling or another project.   
  4. Preheat oven to 350 degrees and spray an 8' x 8' square pyrex dish with cooking spray.
  5. In small bowl, combine puree, milk, egg, vanilla and mix well until blended. 
  6. In the bowl of your stand mixer, add flour, sugar, baking powder and salt and mix to combine. Don't forget the sugar!  I did, and didn't realize it until I was just about to pour the batter into the dish!
  7. Keep beating at slow speed and add the butter.  Mix until combined and the batter resembles crumbs. 
  8. Now, pour in the liquids and beat at medium speed for about 1 minute or until fully blended.
  9. Scrape down the sides of the bowl, give the bottom a good scoop, and if you'd like, add a few drops of food coloring to get a pretty red or pink color.  
  10. Pour the batter into the pyrex dish and even out the top.  Bake for 30-35 minutes or until until a toothpick inserted in the center comes out clean.  Keep an eye on it, I checked it after 25 minutes, and I *think* I gave it another 10...but you should just watch it after 30 to be safe.  
  11. Let the cake cool completely in the dish.  
  12. Once cool, cut your cake into 4 equal parts.  
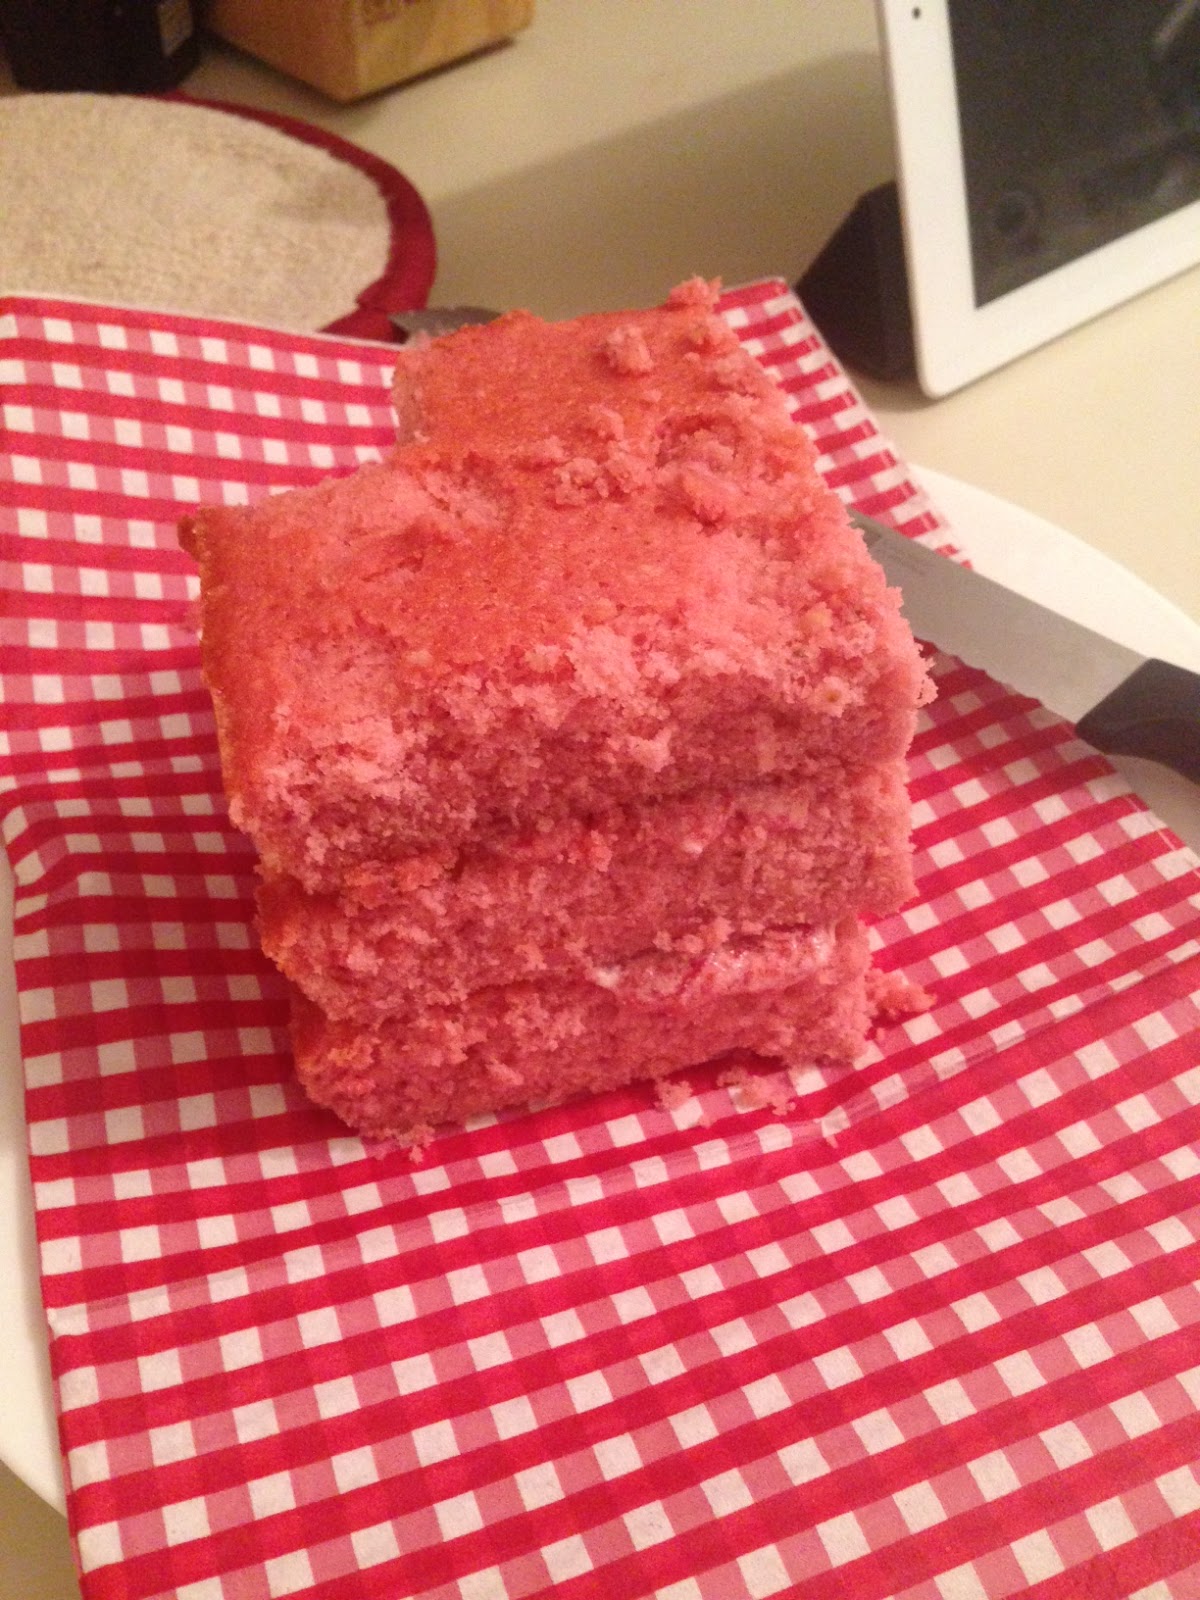
  13. Gently remove one part from the pan, top with a little filling (I mixed two heaping spoonfuls of frosting with my leftover strawberry puree) and stack up your other square pieces in the same way.  For my mini cake, I used three layers, and kept the 4th square as a giant tastie :)
  14. Once you have your layers filled and stacked, take out a bread knife and channel your inner cake boss.  Gently cut out a triangle from one of the corners to create a heart shape, like so (picture below).
  15. Frost and enjoy!
Square cake cut into 4's

Three stacked layers with triangle cut out to form a heart shape

For the frosting, grab the recipe from Oven Love Blog; I followed it exactly to have some leftover frosting.  As I mentioned, I had some trouble getting this to come together the way I think it was supposed to, but the taste with the cake is fabulous and very much worth it!

Sunday, December 16, 2012

Thin Mint Gooey Cake Bars

Hi Sweets, guess what?  I'm baaaack!  I hope you enjoyed the posts from Cheryl and my Jake the past few days!  "B-hubs" as he likes to call him has really been on a baking roll lately, I love it!


Tonight I am excited to share a brand new recipe with you - Thin Mint Gooey Cake Bars!  Yes, I took cookies that are pretty amazing and made an even BETTER cookie, by adding chocolate, Andes candies, and my favorite, cake!

This recipe (and the Thin Mints I used) were shared with me by the Girl Scouts of Eastern MA.  I was so excited to try out the bar cookies to bring to a family Christmas dinner tonight, and they were a hit! The title of "bars" makes you think of brownie-sized bars.  Word to the wise; quarter those squares!  This recipe turns out super delicious, but super SUPER rich.  Like, way too rich for even the biggest sweet lover to eat a whole square.  When cut up into bite-size mini squares, it's the perfect cookie-size portion.

The title tells it all- there's plenty of minty chocolate and lots of delicious (and surprisingly un-messy) 'gooey' atop a buttery yellow cake crust. So good!

The best part is that one of the ingredients you need to make these cookie bars is the Thin Mint cookies themselves.  Now that it's officially Girl Scout cookie time, it's perfect timing to try these out for a holiday gathering.  Cookies are available December 7th through March 12, so keep an eye out for your local Girl Scouts getting their sell on!


When I was a "brownie" and a "junior" Girl Scout, I was always a top seller and had so much fun selling cookies for my Girl Scout troop.  This has been an American tradition for nearly 100 years and all of the proceeds help girls learn important skills while raising funds for leadership activities.  The money helps Girl Scout troops take part in service projects, go on field trips, attend summer camp, etc.  I LOVED Girl Scout camp- who remembers the Squirmy the worm song?!  One thing I learned through working with the Girl Scouts on this recipe is about their Cookies for a Cause program.  Part of the cookie-selling process allows girls to sell boxes of cookies that are put aside to be donated to soldiers overseas or to local food pantries.  What an awesome way to use this well-known project for good.

Girl Scout cookies are $4 a box, and you can visit www.hergirlscouts.com, click on "cookie locator" and enter your zip code to find out where you can buy cookies in your area.

Here's the recipe for Thin Mint Gooey Cake Bars.  Comment below if you try these or have other Girl Scout cookie-inspired recipes!

Need:
1 Yellow Cake Mix
1 stick of softened unsalted butter
1 large egg
1 cup chocolate chips
1 cup Andes Candy mint pieces
1 small can sweetened condensed milk
20 Girl Scout Thin Mint cookies broken into pieces

Do: 
Preheat oven to 350F and coat a 9x13" baking dish with non-stick cooking spray (I always use canola oil spray).

Mix cake mix, butter and egg in a large bowl.  Press dough into the bottom of the prepared baking dish.  Top evenly with chocolate chips and Andes candies.  Pour condensed milk over dough and top with broken pieces of Thin Mint cookies.

Bake for 30-35 minutes until baked through.  Let cool completely.  Cut into squares and serve.

Pat dough in pan
Add chocolate chips
Add Andes candies
Pour on condensed milk
Top with cookie crumbles!
Bake and enjoy!
Disclaimer:  This is a (semi) sponsored post.   The Girl Scouts reached out to me asking if I would be willing to try out and feature a fun new recipe using Girl Scout cookies if they sent me the cookies for free.  I happily agreed, being a Girl Scout alum and cookie lover!  The only benefit I got for this post was the box of free cookies (and fun new recipe.)  All other supplies were purchased by me, and the honest opinions expressed in this post are all my own.

Monday, May 28, 2012

Mini Cake- Small Batch Baking!


And birthday season continues!  Today I want to share a mini birthday cake I made for my Auntie Judy.  I brought this to our family's Memorial Day/Auntie's birthday cookout.  After loads of grilled meats, veggies, salads and fresh corn on the cob, I knew a huge slab of cake wouldn't be on the top of everyone's dessert wish list...a nice bowl of fresh berries with cool whip was more like it!  But, what is a birthday without a little cake?!

For this cake, I didn't want to make a full batch of batter and frosting and have tons of leftovers, so I researched some recipes and adapted a couple from Country Living for this 'small batch' project and the result was perfect.


The following recipe makes a two-layer 4" cake and enough frosting to generously cover the mini-cake.  Both recipes follow steps that are different from what I typically do when baking, which made it fun.  The frosting comes out super creamy and light- I love it!  I didn't like the extra buttery flavor, so added in some vanilla and it was perfect.  I filled this mini-cake with raspberry preserves and it was the perfect summer cake to pair with Grammy's berries and cool whip.


For the finishing decorative touch, I covered the whole cake in old school multi-color sprinkles before piping a "J" for Judy on top. I just love the whimsy of white frosting, bright sprinkles and birthday candles.  Perfect!


Do you have any small-batch baking recipes?  Let me know in the comments below!

Mini vanilla cake (makes one two-layer, 4" cake)
Adapted from this Country Living Basic Vanilla Cake recipe

Need:
  • 3/4 cup flour
  • 3/4 tsp baking powder
  • 1/8 tsp kosher salt
  • 1/2 stick unsalted butter, softened
  • 1/2 cup sugar
  • 1 large egg
  • 1/4 tsp. vanilla extract
  • 1/4 cup skim milk
Do:
  • Pre-heat oven to 400 degrees
  • Spray two 4" cake pans with non-stick spray
  • Mix flour, baking powder and salt in large mixing bowl
  • Beat in the butter, one small spoonful at a time until the mixture looks like coarse sand
  • Beat in the sugar, 1 tablespoon at a time, until the mixture looks like fine, damp sand (NOTE- make sure to scrape down the bowl a few times, especially the bottom.)
  • Beat in the egg
  • Beat in the vanilla and milk on medium-high, until just blended.  Do not overmix!!
  • Pour batter into prepared pans and bake for 30 minutes
  • Cool for 5 minutes in the pan, then completely out of the pans.

Need:
  • 1/4 c. melted unsalted butter
  • 1/4 c. cold unsalted butter, cut into small pieces
  • 1 3/4 c. confectioner's sugar
  • 1/4 tsp. kosher salt
  • 2 tablespoons milk
  • 1 tsp. lemon juice
  • 1 tsp. vanilla extract
Do:
  • Beat the 1/4 c. melted butter with the confectioner's sugar, salt, milk, lemon juice and vanilla in a mixing bowl on medium-high. 
  • Beat in the 1/4 c. cold butter, one small piece at a time, mixing well after each piece.
  • Use immediately, or chill. If you put this in the fridge and use it later, let it sit out for 5-10 minutes, then whip with a little extra milk or vanilla to make it 'fluffy' before using.


Tuesday, August 23, 2011

Mini Margarita Cupcakes!


Before the summer is long gone, I had to share these delicious summery cupcakes with you.  I spotted them on one of my favorite Boston blogs - Delicious Dishings - and knew I had to try them out.  Hub's family were the lucky chosen ones who got to try them out on the 4th of July.


While these little cuppies were admittedly a lot of work, trust me, they are worth it!!  The other call-out is that these are definitely for adults only!  The alcohol flavor is very noticeable and while you will not get a buzz from eating a mini, it's probably not a treat you want to feed a child.


I followed Megan's recipe to a T, so if you want to try for yourself, click here for the instructions.  The recipe made TONS of minis, plus I made two thin 8" cakes that I stuck in the freezer to use when I'm in a pinch.


If you love margaritas, you will love these cupcakes.  The cake is nice and light and limey, and the tequila-lime frosting is SUPER creamy, smooth and delicious.  If you pop a whole one in your mouth it honestly tastes JUST like a classic margarita.  Weird thing that happened to mine- as the cuppies cooled, the little paper liners detached themselves from the cupcakes, you can kind of see that in the picture above.  Maybe too much alcohol?  Anyway, if you try these, ENJOY, and let me know what you think!!