

Showing posts with label Pink. Show all posts
Showing posts with label Pink. Show all posts
Thursday, February 14, 2013
Happy Valentines Day!
I hope everyone has a beautiful, happy day full of love! Thank you to my sweet husband who sent these gorgeous peonies and hydrangea to work today, I love you!

Monday, May 21, 2012
Pimm's Cup Cupcakes!
One of my favorite gifts I've received was given to me twice, separately by two different friends: copies of a cookbook called "Booze Cakes." it's a cute little book packed with recipes for sweets that are inspired by popular "adult beverages" or are traditionally made with spirits. I think my annual Carbomb Cupcakes are what's inspired the purchase by both friends, as I love the idea of bringing cocktail favors into dessert. My favorite recipe in the book is for chocolate merlot cake bites, but I will save that for another time. Today I want to share a recipe that I made up myself for Cupcake Camp 2012, inspired by my Booze Cakes book- Pimm's Cup mini cupcakes. Cupcake Camp was a blast and I will be sharing a recap soon!

A Pimm's Cup is a traditional and refreshing spring/summer cocktail that mixes Pimm's #1 licqueur with lemonade and or ginger ale, and is topped with a variety of garnishes, usually mint and cucumber. I am excited to share my dessert version- Pimm's Cake with Pink Lemonade buttercream and a minted, candied cucumber garnish. The finished product is a nice nod to the classic drink, with a little twist thanks to the pink lemonade flavor. The candied cucumbers are definitely different, but worth a try. They'd also be great in a cucumber martini!


If any of you attended Cupcake Camp and tried one, let me know what you think below! And if you want to try these yourself, here are the recipes:

Pimm's Cake
1 c. Pimms licquor
2.5 cups all purpose flour
1 tbsp. baking powder
.5 tsp kosher salt
1 stick unsalted butter
.5 cup granulated sugar
2 eggs
1) Pre-heat oven to 350.
2) Pour put 1 cup of Pimm's and set aside.
3) In a medium bowl, sift together flour, baking powder and salt. Set this aside too :)
4) Cream butter and sugar together in a large mixing bowl.
5) Add one egg to the bowl, mix well, and then add the other egg and mix well
6) With the mixer on low, add in 1/3 cup of Pimm's, mix then add 1/3 of the flour mixture and combine.
7) Repeat step 6 two more times until all Pimm's and flour are incorporated.
8) Beat all together for one more minute.
9) Line mini cupcake tin with liners and use a teaspoon to fill the liners with batter about 2/3 full
10) Bake! Mine were perfect at 9 minutes.
Pink Lemonade Buttercream
7 tbsp. frozen pink lemonade (thawed)
4 cups confectioner's sugar
2 sticks of butter
3 drops red food coloring (you can adjust this or leave it out depending on the color frosting you would like)
1) Cream butter in mixing bowl until smooth.
2). Add confectioners sugar 1 cup at a time, beating well after each addition. I added 1 or 2 tablespoons of the pink lemonade with each cup of sugar until it was used up, and the red food coloring at the end.
Minted, Candied Cucumbers (my take on the recipe shared by the Cupcake Project)
1 cucumber
2 cups of sugar
2 cups of water
1/3 cup finely chopped fresh mint
1) Slice cucumbers into thin rounds and cut into quarters.
2) Use a wide pan at least 2" deep and pour in the water and sugar.
3) Heat on medium high and stir until sugar is fully dissolved.
4) Add the cucumbers in a single layer and reduce heat to medium-low. Most pan sizes require this be done in two batches to keep the cucumbers from overlapping. Cook each batch for 20 minutes.
5) While the cukes are poaching, line a large baking sheet with parchment paper.
6) When the 20 minute cook time is complete, use a slotted spoon to transfer the cucumbers to the parchment-lined cookie sheet, again in a single layer.
7) Place the cookie sheet in a 180 degree oven for 2 hours to dehydrate.
8) Finished candied cucumbers will be a bit sticky. Peel off from the parchment paper and garnish your cupcakes!

A Pimm's Cup is a traditional and refreshing spring/summer cocktail that mixes Pimm's #1 licqueur with lemonade and or ginger ale, and is topped with a variety of garnishes, usually mint and cucumber. I am excited to share my dessert version- Pimm's Cake with Pink Lemonade buttercream and a minted, candied cucumber garnish. The finished product is a nice nod to the classic drink, with a little twist thanks to the pink lemonade flavor. The candied cucumbers are definitely different, but worth a try. They'd also be great in a cucumber martini!


Pimm's Cake
1 c. Pimms licquor
2.5 cups all purpose flour
1 tbsp. baking powder
.5 tsp kosher salt
1 stick unsalted butter
.5 cup granulated sugar
2 eggs
1) Pre-heat oven to 350.
2) Pour put 1 cup of Pimm's and set aside.
3) In a medium bowl, sift together flour, baking powder and salt. Set this aside too :)
4) Cream butter and sugar together in a large mixing bowl.
5) Add one egg to the bowl, mix well, and then add the other egg and mix well
6) With the mixer on low, add in 1/3 cup of Pimm's, mix then add 1/3 of the flour mixture and combine.
7) Repeat step 6 two more times until all Pimm's and flour are incorporated.
8) Beat all together for one more minute.
9) Line mini cupcake tin with liners and use a teaspoon to fill the liners with batter about 2/3 full
10) Bake! Mine were perfect at 9 minutes.
Pink Lemonade Buttercream
7 tbsp. frozen pink lemonade (thawed)
4 cups confectioner's sugar
2 sticks of butter
3 drops red food coloring (you can adjust this or leave it out depending on the color frosting you would like)
1) Cream butter in mixing bowl until smooth.
2). Add confectioners sugar 1 cup at a time, beating well after each addition. I added 1 or 2 tablespoons of the pink lemonade with each cup of sugar until it was used up, and the red food coloring at the end.
Minted, Candied Cucumbers (my take on the recipe shared by the Cupcake Project)
1 cucumber
2 cups of sugar
2 cups of water
1/3 cup finely chopped fresh mint
1) Slice cucumbers into thin rounds and cut into quarters.
2) Use a wide pan at least 2" deep and pour in the water and sugar.
3) Heat on medium high and stir until sugar is fully dissolved.
4) Add the cucumbers in a single layer and reduce heat to medium-low. Most pan sizes require this be done in two batches to keep the cucumbers from overlapping. Cook each batch for 20 minutes.
5) While the cukes are poaching, line a large baking sheet with parchment paper.
6) When the 20 minute cook time is complete, use a slotted spoon to transfer the cucumbers to the parchment-lined cookie sheet, again in a single layer.
7) Place the cookie sheet in a 180 degree oven for 2 hours to dehydrate.
8) Finished candied cucumbers will be a bit sticky. Peel off from the parchment paper and garnish your cupcakes!
Monday, December 12, 2011
White Chocolate Cherry Shorbread Cookies
When I think Christmas cookies, I think of pretty, festive, and most importantly, delicious bite-sized treats-- and that's just what these little pink cookies are!

I recently took place in the first annual Great Food Blogger Cookie Swap, where food bloggers bake and send a dozen cookies out to three bloggers, and in return, you receive a dozen cookies from three other bloggers. Needless to say, my husband thinks this is the greatest blogging project I've ever participated in! I loved it for the fun of receiving three packages of treats, and finding six new food blogs to read!

Choosing which cookie to make was not as easy as I thought it would be. I'm inspired daily by others' creations that I see on Pinterest, and I changed my mind four or five times before deciding on these, but in the end I think I picked the right cookie! They're small, chewy, cheery pink and cherry-flavored with festive white chocolate and red sprinkles. I sent off three pink cookies jars full off to Stephanie at Okie Dokie Artichokie, Erin at The Spiffy Cookie, and Allison at Allison Eats.

In return, I received almond crescent cookies from Return to Sunday Supper, Snickers Surprise cookies from Lindsay at The Little Foodie and gluten-free Chai Snickerdoodles from Catherine at Munchie Musings. They were all delicious- and I thank you all so much for your generosity, and beautiful packaging!!!
For anyone who thinks these shortbread cookies have a place on your holiday table, the recipe is fairly easy, though time-consuming if you make lots of little cookies like I did. For a quicker turnaround, I'd suggest making fewer, bigger sized cookies.

And for any fellow food bloggers who missed out on the swap this year, you can sign up here to get notifications for next year's swap!
Happy Holidays!

White Chocolate Cherry Shortbread Cookies
Adapted from Better Homes & Gardens
Need:


I recently took place in the first annual Great Food Blogger Cookie Swap, where food bloggers bake and send a dozen cookies out to three bloggers, and in return, you receive a dozen cookies from three other bloggers. Needless to say, my husband thinks this is the greatest blogging project I've ever participated in! I loved it for the fun of receiving three packages of treats, and finding six new food blogs to read!

Choosing which cookie to make was not as easy as I thought it would be. I'm inspired daily by others' creations that I see on Pinterest, and I changed my mind four or five times before deciding on these, but in the end I think I picked the right cookie! They're small, chewy, cheery pink and cherry-flavored with festive white chocolate and red sprinkles. I sent off three pink cookies jars full off to Stephanie at Okie Dokie Artichokie, Erin at The Spiffy Cookie, and Allison at Allison Eats.

In return, I received almond crescent cookies from Return to Sunday Supper, Snickers Surprise cookies from Lindsay at The Little Foodie and gluten-free Chai Snickerdoodles from Catherine at Munchie Musings. They were all delicious- and I thank you all so much for your generosity, and beautiful packaging!!!
For anyone who thinks these shortbread cookies have a place on your holiday table, the recipe is fairly easy, though time-consuming if you make lots of little cookies like I did. For a quicker turnaround, I'd suggest making fewer, bigger sized cookies.

And for any fellow food bloggers who missed out on the swap this year, you can sign up here to get notifications for next year's swap!
Happy Holidays!

White Chocolate Cherry Shortbread Cookies
Adapted from Better Homes & Gardens
Need:
- 1/2 Cup Maraschino cherries
- 2-4 tbsp. of juice from the cherry jar
- 2 1/2 cups flour
- 1/2 cup sugar
- 2 sticks cold butter
- 1 package of white chocolate chips - chopped in processor or by hand
- 1/2 tsp. almond extract
- 2 tsp. shortening
- Red sprinkles (or any kind of sprinkle you'd like)
Do:
- Preheat oven to 325 degrees.
- Chop the cherries (stems removed) in a food processor as finely as possible; you can also chop them by hand but I love the speed and ease of the processor. Pour the cherries and their juice (add 2-4 extra tablespoons of juice from the jar to the bowl as well- use two for color, four for color and flavor.)
- Mix the flour and sugar in a large bowl, and then using a pastry cutter or two knives, cut in the butter until it is combined into a crumbly mixture. I WRECKED my pastry cutter doing this- my butter may have been too cold- just a heads up to be careful!
- Stir in cherries, cherry juice, 2/3 cup of white chocolate bits, and almond extract. Knead all ingredients together and form a nice smooth doughy ball.
- Shape dough into 3/4 inch balls (if you want to make LOTS!) or 1 - 1.5 inch balls for bigger cookies.
- Place each ball 2 inches apart on an ungreased cookie sheet. Take a water glass, dip the bottom in water and then into sugar to coat it. Smush the balls of dough into thin discs with the sugar-coated cup.
- Bake for 10-12 minutes, cool 1 minute on the cookie sheet and then move to wire racks to cool completely.
- When all the cookies are cooled, mix the rest of the white chocolate with the shortening in a small saucepan. Stir over low heat until melted and combined.
- Dip half of each cookies into the chocolate and let the extra drip off, or scrape it off with a spatula or spoon. While the white chocolate is still wet, roll the edge through the sprinkles to decorate.

Saturday, November 26, 2011
Raspberry Margarita Rosette Cake
Happy Saturday, Sweets! I hope everyone had a very happy Thanksgiving!
In honor of National Cake Day, I wanted to share one of my latest cakes with you. I was inspired by someone else's cake I found on Pinterest, covered in buttercream rosettes, and decided to recreate the masterpiece for myself with leftover raspberry frosting from my Baby Shower Cupcakes.
I had two frozen lime margarita cakes (I had baked these with batter leftover from my mini margarita cupcakes) that paired perfectly with the buttercream to make a Raspberry Margarita cake- YUM!

So how does one achieve such a pretty floral look? All it takes is one of my favorite icing tips- the Wilton 1M. (You can buy it here or check your local craft store's cake section).

I didn't take enough pictures to give you a full tutorial, but if you are interested in learning how to do this let me know and I will put a step-by-step post together. It is actually quite easy to take your cake from this...


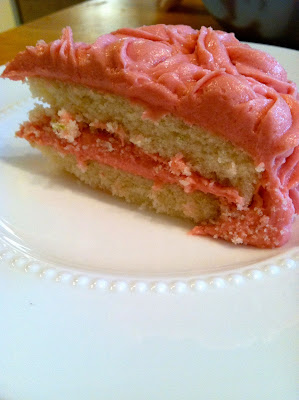

In honor of National Cake Day, I wanted to share one of my latest cakes with you. I was inspired by someone else's cake I found on Pinterest, covered in buttercream rosettes, and decided to recreate the masterpiece for myself with leftover raspberry frosting from my Baby Shower Cupcakes.
I had two frozen lime margarita cakes (I had baked these with batter leftover from my mini margarita cupcakes) that paired perfectly with the buttercream to make a Raspberry Margarita cake- YUM!

So how does one achieve such a pretty floral look? All it takes is one of my favorite icing tips- the Wilton 1M. (You can buy it here or check your local craft store's cake section).

I didn't take enough pictures to give you a full tutorial, but if you are interested in learning how to do this let me know and I will put a step-by-step post together. It is actually quite easy to take your cake from this...


To this...!
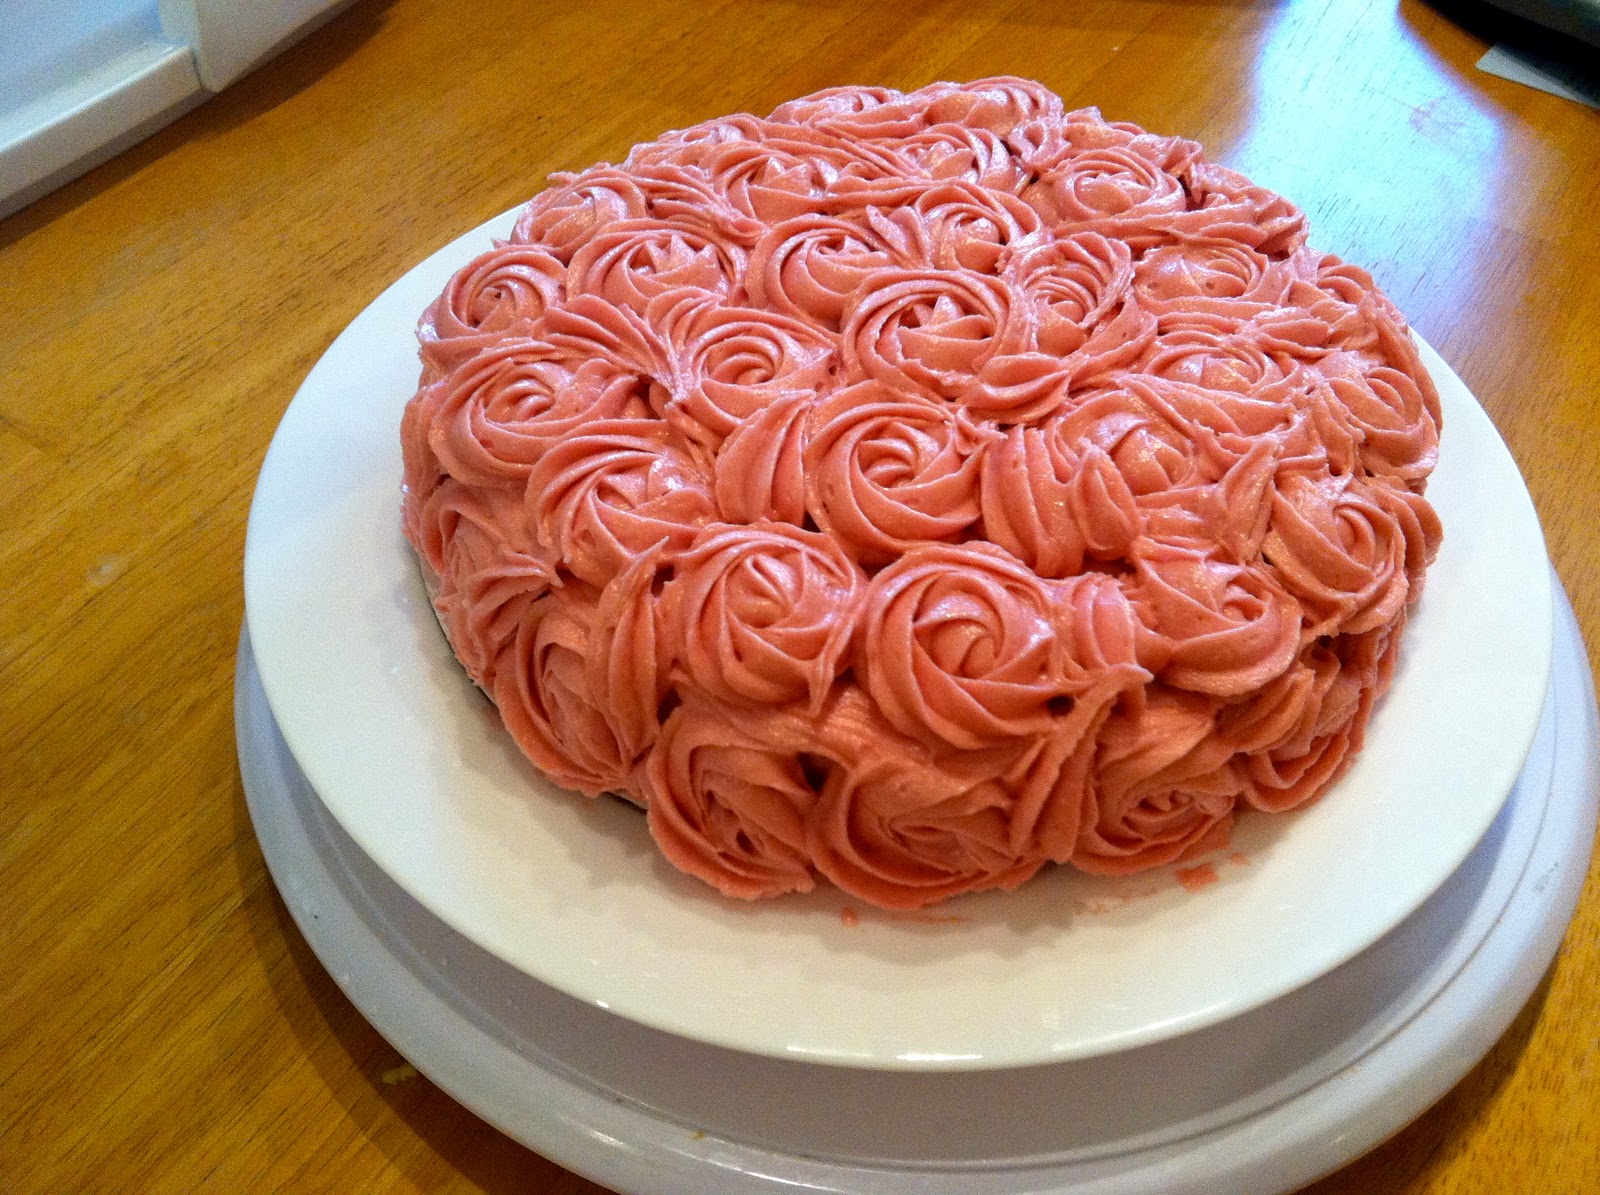

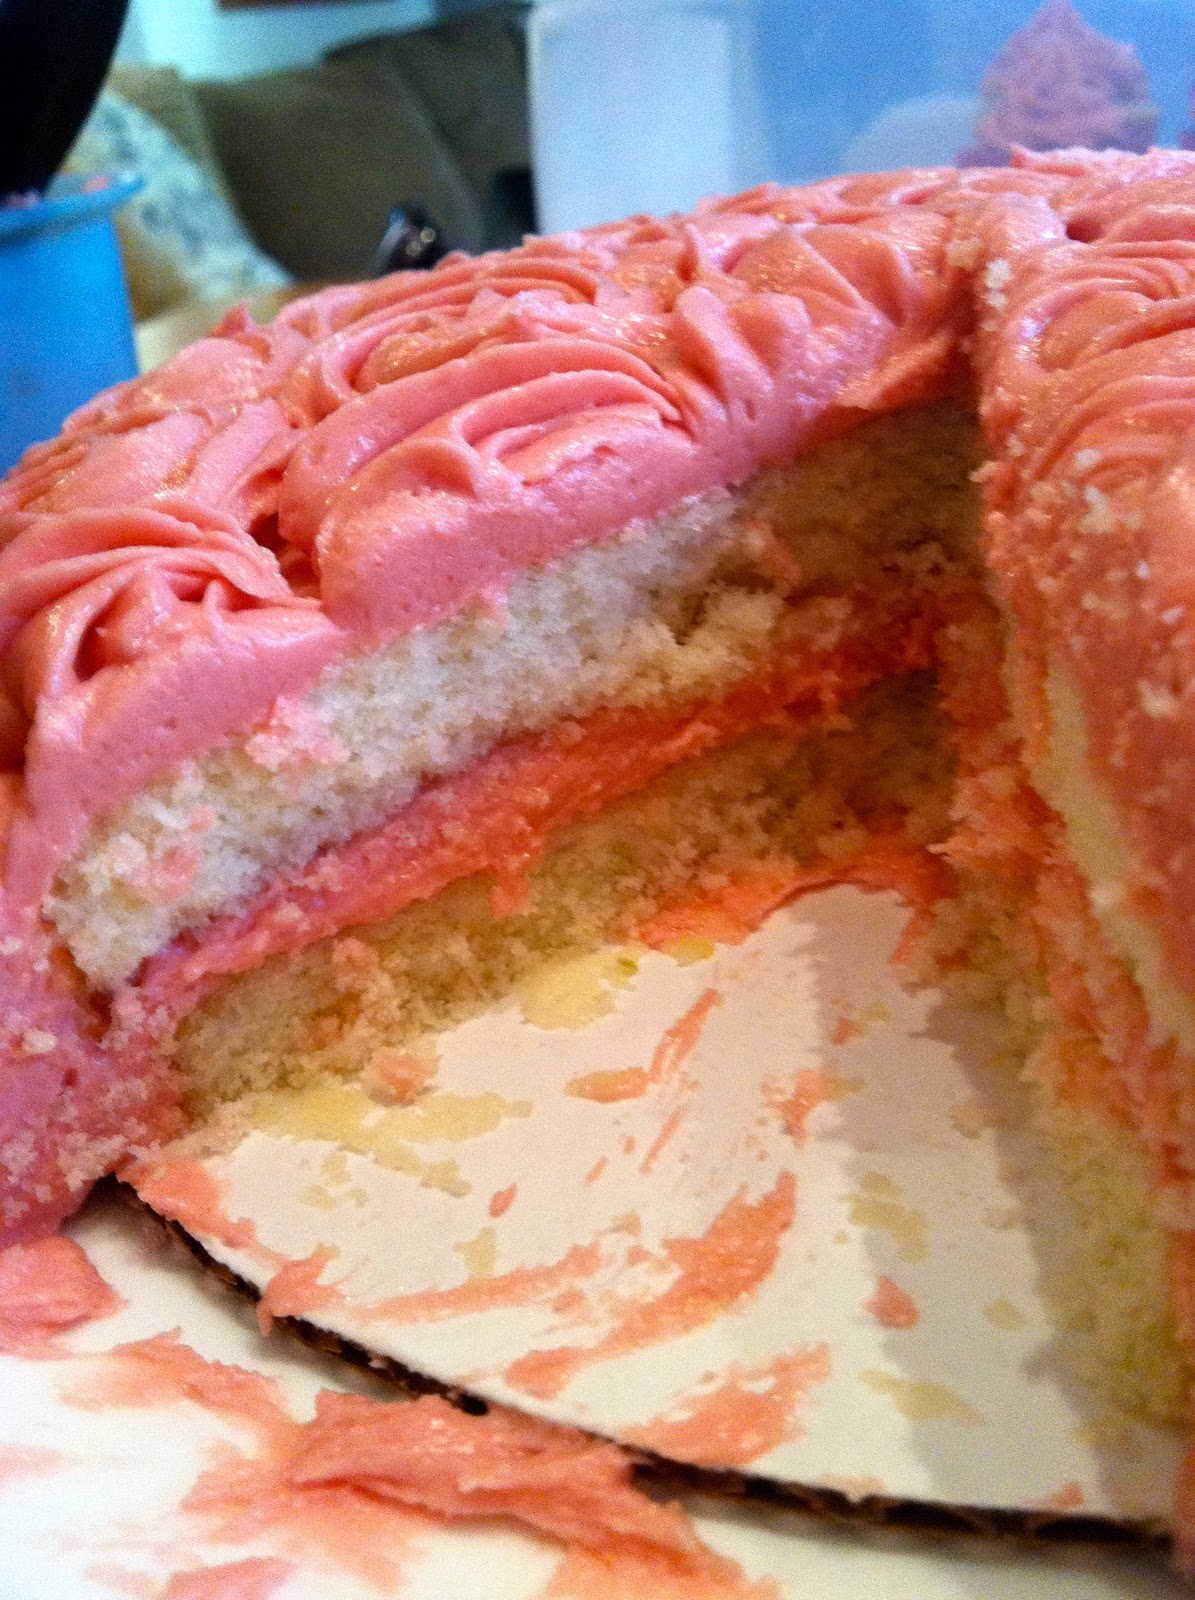
Happy Cake Day, Sweets!
Sunday, August 28, 2011
Chocolate Oreo Cupcakes with Strawberry Fluff Frosting

Today I am happy to share the first post of 4 in my self-made Martha Stewart Cake for Every Pan challenge. In the September issue of Everyday Food, Martha published four different cake recipes that use four different types of cake pans. I challenged myself to try all four and blog them, because all four look really tasty! Here's the lineup:
-8" Round pan: Plum/blueberry upside down cake
-Cupcake pan: Cookie cupcakes with raspberry fluff frosting
-Loaf pan: Almond-grape tea cake
-Sheet pan: Vanilla sheet cake with malted milk chocolate frosting

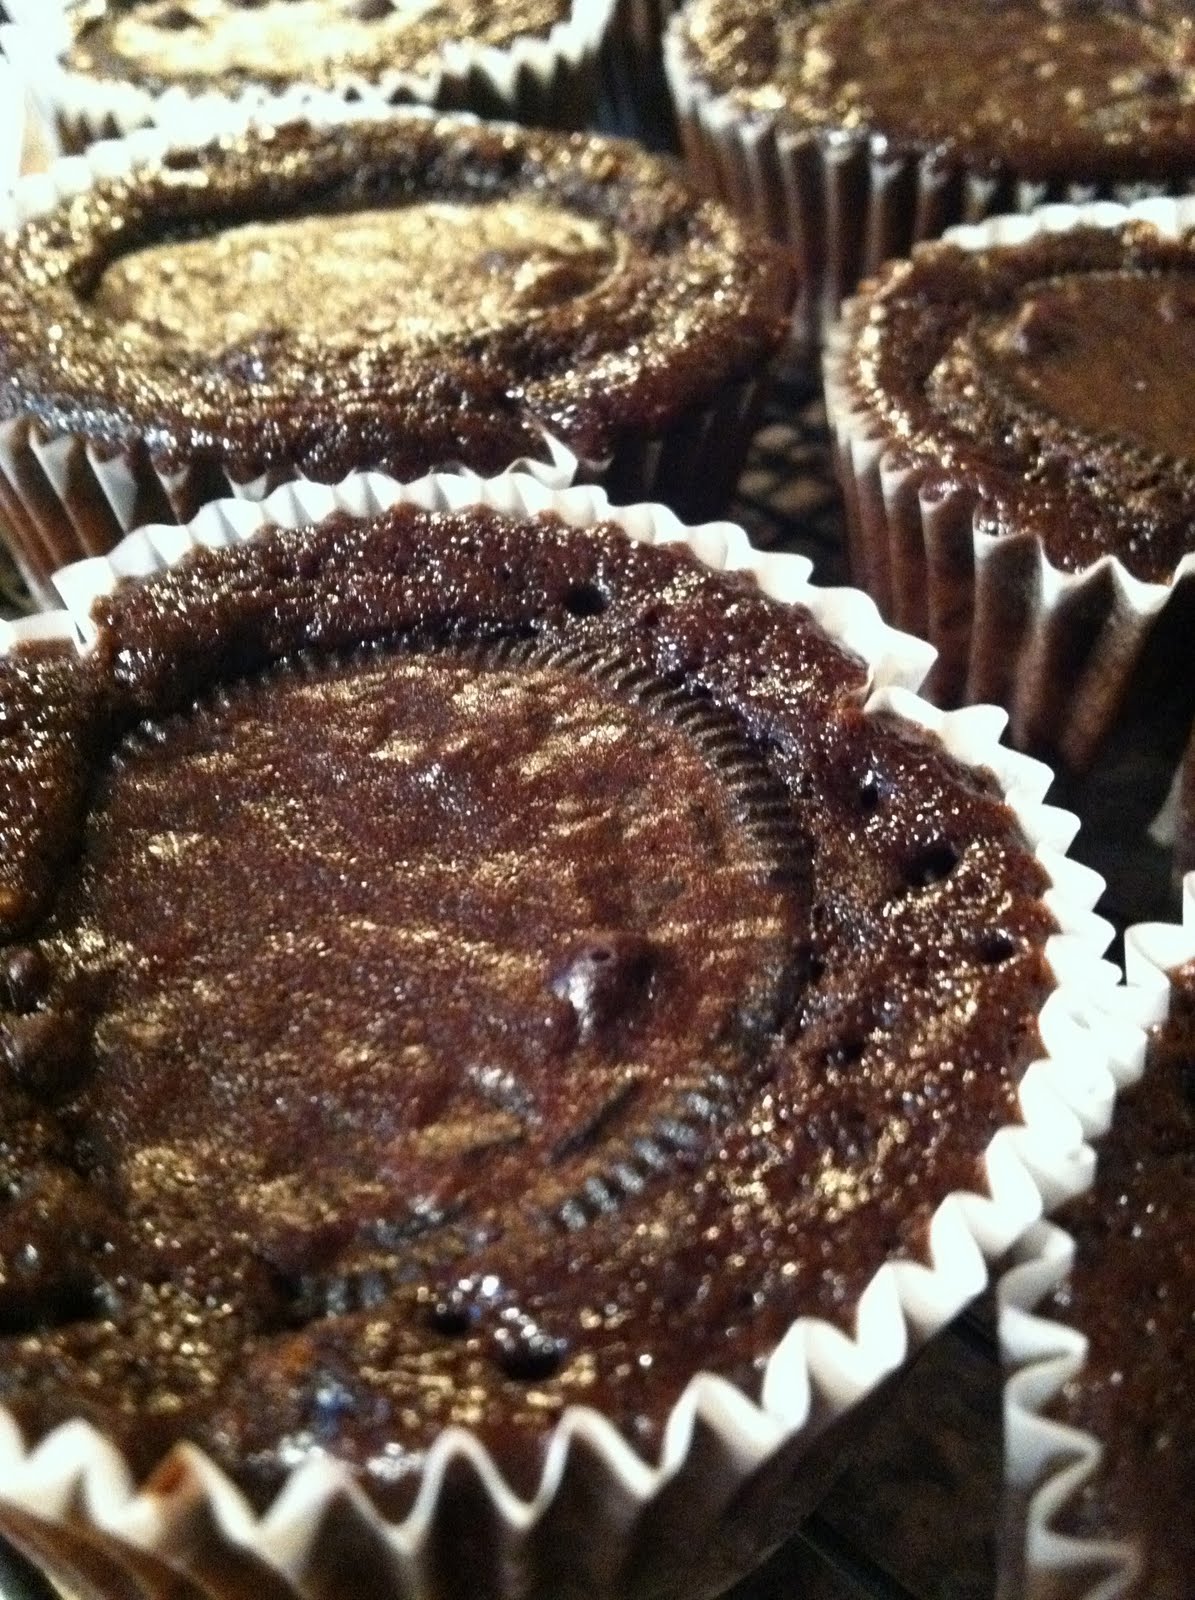
So, for the first Cake for Every Pan project, I bring to you chocolate oreo cupcakes with strawberry fluff frosting. I chose these because it is my birthday and I love chocolate, so I thought these would make a great treat for myself! :D The recipe is very easy and comes together fairly quickly. The cake is dense, the frosting is smooth and creamy- similar to oreo filling, and the whole treat together is fantastic. It's like a supercharged sweet- delivering cake, cookies, and FLUFF all in one bite. These babies are de-lish and I am sure these would be a hit at a dinner party or work event or any place where you want to make sure people like you (haha!)
Lastly, I'm sure many of you have heard about Hurricane Irene which has come up the east coast. My thoughts and prayers are with all who have been affected by this storm; power outages, blowing debris, flooding, etc. are not fun and I wish people safety and fast and efficient clean-up! Hubs and I were fortunate to have only seen a small bit of rain and a few strong wind gusts. We've had our power all day and are comfy, cozy and safe at home.
Let me know how your cookie cupcakes come out, and keep an eye out for the 8" upside down cake I'll be posting about next! Here is my version of Martha's recipe; I tweaked slightly for the ingredients I had on-hand.
Oreo Cupcakes with Strawberry Fluff Frosting

Need:
- 2 sticks of butter, room temperature
- 1/2 cup unsweeted cocoa powder
- 1 cup all-purpose flour
- 1 cup granulated sugar
- 3/4 tsp baking soda
- 1/2 tsp baking powder
- 1/4 tsp salt
- 1 large egg plus 1 large egg yolk
- 1/2 cup buttermilk
- 1/2 tsp vanilla
- 12 oreo cookies
- 3 tbsp strawberry preserves
- 3 cups Fluff
- 1/3 cup confectioner's sugar
Do:
- Preheat oven to 350 degrees and line your cupcake pan. The recipe makes ~12...I got 17 cupcakes at the end.
- Melt 2 tbsp butter, and put it aside to cool.
- In the bowl of your mixer, whisk together cocoa, flour, sugar, baking soda, baking powder, and salt.
- In a separate bowl, beat the egg and egg yolk with a fork, and add to the cocoa mixture.
- Also add buttermilk, vanilla, melted butter, and 1/2 cup of hot water to the cocoa mixture. Use the whisk attachment and whisk until smooth.
- Using a measuring spoon, put 1 tablespoon of batter into each of your cupcake cups.

- Drop an oreo in each cupcake cup- do not press it down

- Using your measuring spoon, put another 1- 1.5 tablespoons of batter on top of each cookie. The cookies will show through a little bit; it's okay!

- Bake for 15 minutes, and then let cool on a cooling rack.

- For the frosting, mix the remaining butter and strawberry preserves together in your mixer with the paddle attachment until smooth.
- Add the Fluff and confectioner's sguar and beat until fluffy, about three minutes. Note- as you can see, my frosting came out more white than pink. If you want a prettier frosting, I'd try adding a couple drops of red food coloring to make the frosting more pinky.
- Pipe or frost cupcakes however you like (Probably a good idea to let the cupcakes cool completely because the frosting is a little runny, you don't want it to melt even more.)

Saturday, May 14, 2011
Bridal Shower Cake - Stephanie & Dennis

Today I had the honor of putting together a three tier bridal shower cake! It has been a while since I decorated a cake, so I was beyond excited to take on this project when one of my girlfriends asked me for the favor.
The most important thing about any fancy cake is making sure that it tastes good! My friend gave me full creative license with flavors, so I went with a springy combo of pink champagne cake, strawberry filling, and almond icing.
Putting together a nice tiered cake takes a little leg work but it's well worth it. I learned all my tricks from the Wilton Cake Decorating courses I took at Michael's. My instructor, Maxine, was amazing, and a little fireball. Her recipe for flawless decorator's icing listed at the end of this post is my go-to recipe for cakes that need to last a couple days and have decorations that hold up.
Are you thinking of trying out a tiered cake? Here's a few tips as you work through it. First, you want to make sure all of your cakes are level. Wilton sells a leveling tool, but I just eyeball it and use a bread knife.


Once they're leveled, pipe a border of icing around the edge of the cake, called a "dam." This will prevent your filling from oozing out the edges. Let the dam set for a few minutes (put it in the fridge to speed this part up if you'd like), and then add your filling.


Once your bottom layer is filled, gently place on the top layer. Make sure the flattest side is up.


Next, you want to "crumb coat" all of your tiers. This means putting a thin layer of your buttercream on to trap any crumbs that may come off into the icing. All of your cakes should be on cake boards the same size as the cake. You can buy pre-cut ones at most craft stores, or cut your own out of old cardboard boxes and cover them with foil to make them look nice. Make sure your crumb coat is nice and smooth, and let this set for at least 30 minutes. I like to let mine set in the fridge, as it's much easier to work with cold, stiff cakes than warm, soft ones.
While you're waiting, I highly recommend trying a tastie- we ate cake scraps topped with filling and icing to make sure everything paired well. After 3 or 4 tasties each, hubs and I agreed that this cake was going to be a hit.

After your crumb coat has set, it's time to create some support in your cakes. Depending on how big and heavy your cake is, you can use different types of support. I used plastic smoothie straws. Stick a straw in the cake (put it in a place that will definitely be covered by the next tier!) and pull it out. Trim your support and use that first one to measure others for your layers. I used 4 on the bottom layer and 2 for the middle layer. You want to measure and trim your supports, FULLY FROST your cake, and then put your supports in last.


Decorator's tip - see the pretty design on my cake? I achieved that look by gently pressing a paper towel onto the top! This is a nice touch when frosting with buttercream instead of fondant. Some people use a small foam roller to smooth out their icing. You can buy these for less than a dollar at any hardware store.
So now your cakes are frosted and supported, it's time to stack them! Very gently, place your middle tier ontop of the bottom, and then place the top tier on the middle. Depending on the size of your cake, tie all three layers together by putting a sharp support straight down through the middle. This cake was rather small and compact so I didn't include that here. Now's the fun part, decorating time!!

I used white and yellow buttercream and a spool of ribbon to decorate this cake. Pressing the ribbon into the icing while it is just barely still tacky will make it stick yet still be easy to remove without pulling off all the icing.

And, voila! Three tiered wedding cake! Best wishes to Stephanie and Dennis as your wedding approaches - enjoy every minute!

Maxine's Decorating Icing:
Note - S= small batch, M= medium batch, L= Large batch
Need:
Shortening - S, 1 cup. M, 2 cups. L, 4 cups.
Milk - S, 1/4 cup. M, 1/2 cup. L, 1 cup.
Confectioner's Sugar - S, 1 pound (4 c). M, 2 pounds (8 c). L, 4 pounds (16 c.)
Flavoring - S, 1tsp. M, 1 1/2 tsp. L, 2 tsp.
*I made a medium batch for this cake and had some leftover.
Do:
- Soften shortening by stirring it in the mixing bowl for about 2 min.
-Add confectioner's sugar in 3 - 4 batches. After each batch, add part of your milk, and part of your flavoring
-Continue whipping until desired consistency and flavor. Add more sugar to stiffen, more milk/flavoring to soften.
Wednesday, May 11, 2011
Kappa Tuesday: Simply Sweet & a Teaser
I love girls nights. Really, there are few things better than eating good food, drinking good wine, and savoring delicious dessert over uninhibited girl talk with your besties. Last night's Kappa Tuesday was epic. We went through more wine than usual, hung out longer than usual, and laughed as much as we always laugh. Perfection.


You know what else was perfect? Lindsay's dessert last night. She brought over chocolate frozen yogurt and fresh, mixed berries. So simple, and SO good, so satisfying and perfect for a girls night.

I think what made this dessert was the high quality ingredients. I'd never tried Stonyfield fro-yo before last night, and I was so impressed with how creamy, rich and ultra-chocolatey it was. There was none of that yogurt tang at all; it tasted just like full-fat ice cream. I eat fro-yo all the time, and this may be a new favorite. Also the berries Linds picked up were fresh and ripe, especially the blackberries. YUM.

After we'd polished off our official dessert, the wine was still flowing and we still had plenty of room for more sweets which leads me to my teaser....

Do you know what this is??? I'll give you a few hints, but not too many because I will have a really fun blog post on this coming up this weekend!
-This is a plate full of cake scraps (unofficial tasties!)
-The cake is pink (hopefully you can tell that)
-It's for a celebration
-Do you like champagne?
-Remember how I told you I love cake decorating?
-Super fun project ahead!!
Check back this weekend, and until then, remember, Life is Sweet!
Subscribe to:
Posts (Atom)