Showing posts with label Cake. Show all posts

Wednesday, April 10, 2013

Chevron Baby Quilt - Pinterest Success!

Months ago, I pinned this quilt to my "Crafts to Try" board on Pinterest:

This is the quilt from Pinterest; not mine!

Now that my close friend Jamie is expecting her first baby mid-May, I had a good reason to try and make it!  This baby girl will be my first "niece," and I couldn't be more excited to welcome her into the world.  Excited to make something extra special,  I dug out the ol' sewing machine, took a trip to JoAnn Fabrics and found an easy tutorial online for making a super cute, not-too-girly chevron baby quilt.  I chose a neutral gold-coated muslin and a pretty darker khaki and white flower patterned fabric for the top, and a cute pink polka dot fabric for the back. 

After some serious cutting and pressing, I pieced together the quilt top.


Trimmed off the edges...


Quilted the top to the pretty light pink polka dot backing piece, with a thin batting between them, and then bound the edges...


And voila!  My first quilt in four years was complete, and didn't come out half bad!  I was proud of the sharp corners on the chevron pattern, less proud of the not-even-close-to-perfect binding job.  I hope that my little niece loves it and has lots of cozy naps cuddled up in it!

My finished product!
Annnnnd on a related note, Jamie had the most amazing baby shower.  Here are a few snaps!  All of the amazing food was prepared by her sister who works in the restaurant business in Los Angeles, and the theme of 'peas in a pod' was carried throughout the whole party beautifully by her husband's family.  She's a very lucky girl!


In the bottom right, those are little shooters of homemade tomato soup with grilled cheese sandwiches - my favorite!


The adorable cake!

Not the best shot, but this is Jamie opening up the pretty afghan that my mom crocheted for her. 

Centerpiece; I was crazy about this flower!

Monday, February 11, 2013

Small Batch Baking - Mini Strawberry Cake

Happy Valentines Week, Sweets!

As Thursday quickly approaches, I wanted to share a treat for two that I tried out this weekend.  Mini-cake recipes are hard to come by, but perfect for Valentines Day when you and your sweetie want to share a little post-dinner bite.


This cake is completely from scratch and gets it's amazing strawberry flavor from a fresh strawberry puree.  It's frosted with a cream cheese meringue frosting which is an amazing pair.  The finished cake does take a little time; I made mine over two days and that worked out well.  The pink/strawberry theme makes it perfect for Valentines Day, but this cake would also be an excellent choice in the summer when strawberries are nice and fresh and in season.

Tastie!  Strawberry cake, strawberry cream filling, cream cheese meringue frosting...yup, this combo works!
I adapted this recipe from one I spotted on Pinterest, from Oven Love Blog.  That recipe makes a whole big cake, and mine makes a mini.  I had some serious trouble with the icing and getting it to come together, but the end result tasted great even though it didn't spread/set as nicely as I would have liked.

If you make one of these mini-cakes this week, tell me about it in the comments below!


Mini Strawberry Cake with Cream Cheese Meringue Buttercream

Need:

  • 12 - 14 very ripe strawberries
  • 1/8 cup milk (I used almond milk) at room temperature 
  • 3 large egg whites at room temperature 
  • 1/2 Tbsp vanilla extract 
  • 1 1/8 cup flour
  • 3/4 cup plus 1/8 cup sugar 
  • 2 tsp baking powder 
  • 1/2 tsp salt 
  • 6 Tbsp unsalted butter (1½ sticks), softened (not melted) 
  • Red food coloring (optional) 
Do:
  1.  Trim all the strawberries, slice and toss with a teaspoon of sugar, cover and let them sit at room temperature for an hour or two. 
  2. Place strawberries in a food processor and puree.
  3. Put a little bit more than 1/3 cup of the strawberry puree aside; this will flavor the cake.  The rest can be used for filling or another project.   
  4. Preheat oven to 350 degrees and spray an 8' x 8' square pyrex dish with cooking spray.
  5. In small bowl, combine puree, milk, egg, vanilla and mix well until blended. 
  6. In the bowl of your stand mixer, add flour, sugar, baking powder and salt and mix to combine. Don't forget the sugar!  I did, and didn't realize it until I was just about to pour the batter into the dish!
  7. Keep beating at slow speed and add the butter.  Mix until combined and the batter resembles crumbs. 
  8. Now, pour in the liquids and beat at medium speed for about 1 minute or until fully blended.
  9. Scrape down the sides of the bowl, give the bottom a good scoop, and if you'd like, add a few drops of food coloring to get a pretty red or pink color.  
  10. Pour the batter into the pyrex dish and even out the top.  Bake for 30-35 minutes or until until a toothpick inserted in the center comes out clean.  Keep an eye on it, I checked it after 25 minutes, and I *think* I gave it another 10...but you should just watch it after 30 to be safe.  
  11. Let the cake cool completely in the dish.  
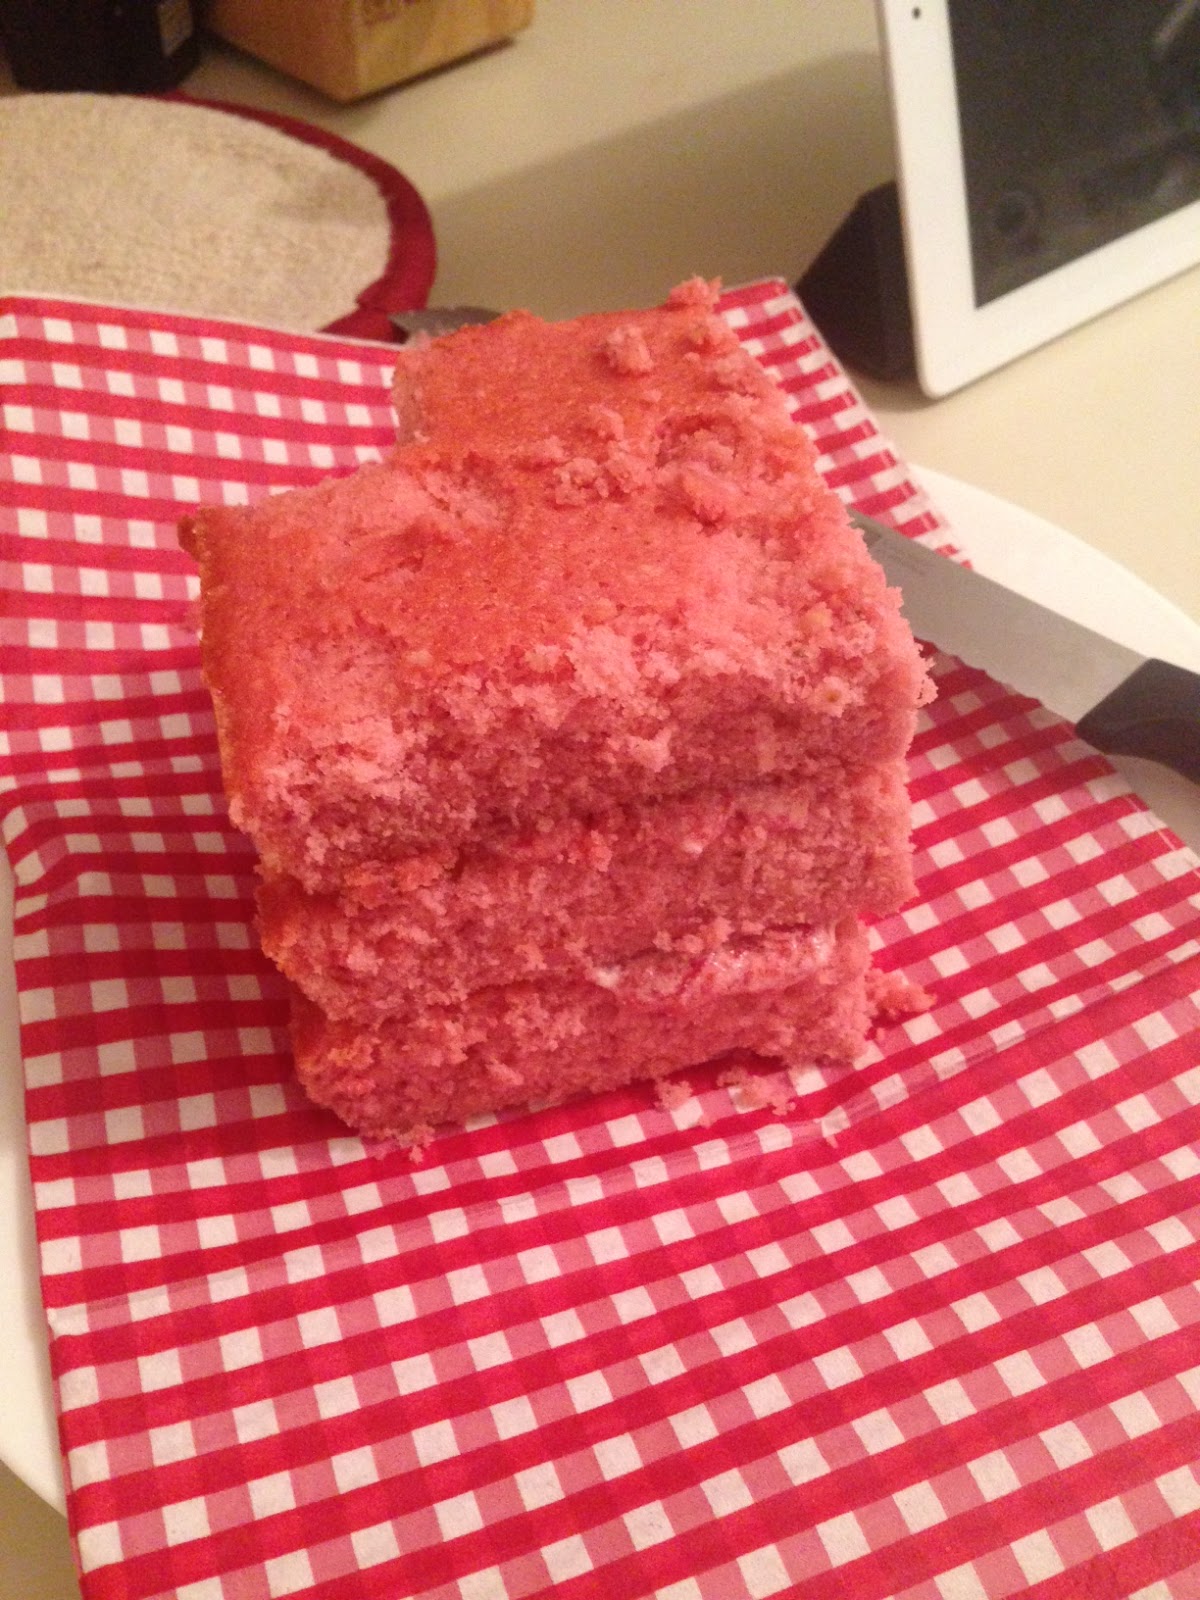
  12. Once cool, cut your cake into 4 equal parts.  
  13. Gently remove one part from the pan, top with a little filling (I mixed two heaping spoonfuls of frosting with my leftover strawberry puree) and stack up your other square pieces in the same way.  For my mini cake, I used three layers, and kept the 4th square as a giant tastie :)
  14. Once you have your layers filled and stacked, take out a bread knife and channel your inner cake boss.  Gently cut out a triangle from one of the corners to create a heart shape, like so (picture below).
  15. Frost and enjoy!
Square cake cut into 4's

Three stacked layers with triangle cut out to form a heart shape

For the frosting, grab the recipe from Oven Love Blog; I followed it exactly to have some leftover frosting.  As I mentioned, I had some trouble getting this to come together the way I think it was supposed to, but the taste with the cake is fabulous and very much worth it!

Saturday, February 2, 2013

The Best Cupcake Ever

I have a confession.  I call myself a "Sweetie" (rather than a foodie), and up until this week, I have never had a Crumbs cupcake.  I don't know how it never happened...it just didn't.

Until this week, that is!  I woke up and was having a bad morning.  It was day 3 of a mild, lingering headache, and one of the cats puked on my Ugg boot.  I was running late and dying for coffee and was basically a huge grump.  I was cutting through the back way of the Pru hoping to stop at Dunkin Donuts for a coffee, and on my way, saw this...


It was like I found Oz!  All of a sudden my grouchiness just melted away and I circled the booth grinning like a schoolgirl at 8:30 in the morning.  As I browsed the selection of massive cupcakes, I spotted my breakfast- Caramel Latte Cupcake.


I picked up three of these chocolate cake, espresso cream-filled, caramel and white chocolate-topped hunks of heaven and headed to the office.  My team and I started off what I coined as "Happy happy fat fat day" on the right foot (even though poor Steph could only eat the frosting, forgot to look for a gluten-free option!) with lots of sugar.  After a few bites in, I was in love...and after a few more bites when I found the espresso cream filling, I was obsessed.  This truly was the best cupcake I've EVER had, and I am psyched and scared that Crumbs is now just right across the street from my office.


What's your favorite Crumbs flavor?  I'll need a list for next time!

PS - how cute are these cake pops?  They're like cake push-up pops...Must grab one next time!

Thursday, January 31, 2013

Boston Olive Oil Company and Chocolate Olive Oil Cake Recipe!

Do you all remember my friend Amy and her husband Zach?  They shared the Bacon & Oatmeal Dried Fruit cookie recipe in December.  Who can forget this picture!?


Anyway, we were lucky to have them visit us here in Boston a few weeks ago, and one of our activities was a trip to the Boston Olive Oil Company on Newbury Street.  Amy and Zach had been to similar shops before and suggested we go in and try different olive oil and balsamic combinations.  Never one to turn down any sort of fatty snack, I happily obliged!


The little shop on Newbury is filled with rows of gleaming stainless steel containers that hold gallons of unfiltered and settled olive oils and traditional Modena balsamic vinegars, all infused with a variety of flavors.  When you enter the store, you're invited to sample as you'd like after reading the tasting policy (which basically says to taste as much as you want if you're going to buy something, and to limit your tastes if you're not going to purchase anything so they can afford to continue to offer tastes.)  If you do decide to purchase, they bottle your choice right in front of you.


We tried some great flavors, like a dark chocolate balsamic vinegar (would be amazing on vanilla ice cream, I bet), and my favorite was dipping a piece of soft bread into a combo of mushroom olive oil with fig balsamic.  That would be an excellent mix to put on a salad, or as a sauce on a mushroom pizza.  Overall the shop was very cool and unique, and I think olive oil and vinegar sets would make a great gift. 


One of the more unique flavors I saw was a blood orange olive oil.  In the shop, they had a recipe for a flourless chocolate and blood orange olive oil cake made with this oil and I immediately thought of those orange chocolate balls people give out at Christmas.  I am not a huge fan of the blood orange flavor, so I didn't purchase the bottle, but wanted to share the recipe as it was so unique.


Enjoy, and have a great weekend, sweets!


Wednesday, January 23, 2013

Skinny Funfetti Cake

Another Tuesday night with a couple of my best friends has come and gone and this week I was on dessert duty. With New Years Resolutions in mind and my Pinterest page exploding with sweet ideas, I decided to try out "skinny" cake.


It came out pretty good! The cake itself was a lot lighter than I was expecting and the frosting tasted great.. For most of the slice anyway! Near the end I started to get a plastic-y aftertaste which wasn't awful but definitely noticeable after eating a pretty big portion.  If you're going "skinny," you should eat less anyway, right?!


As a true "sweetie" I do need to call out that nothing beats real butter, sugar and eggs when it comes to cake.  But, this is a pretty decent alternative when you're trying to give those vices a break.  Lindsay and Shannon both seemed to like it as much as I did, and I will very likely make it again, maybe even try a different flavor combo.


Skinny Funfetti Cake

Need:

  • 1 box of Funfetti cake mix
  • 1 can of diet ginger ale
  • 1 small container of light cool whip
  • 1 box of instant white chocolate flavor pudding mix
  • Sprinkles!


Do:
Empty cake mix into a large bowl and stir in ginger ale until batter is smooth. Bake according to directions on the box. Do not add any other ingredients, all you need is the mix and the soda.

For the frosting, simply mix all of the pudding powder into the cool whip until smooth. This needs to stay refrigerated, so make sure you have enough room in your fridge for the finished cake.

Enjoy!

Sunday, August 12, 2012

Great Wall of Chocolate

Last week I was traveling for work and my client took us to dinner at PF Changs. After a delicious and healthy of grilled mahi mahi, steamed broccoli and brown rice, I was treated to...

The Great Wall of Chocolate! This was a little slice of heaven, and worth saving up the calories for! As someone who is overly particular about cake, I can say with confidence that this cake was GOOD. Moist, purely chocolatey and really, just a perfect dessert. Next one you're a PF Changs, go for the Great Wall. If you don't have anyone to share with, they have a mini version, too :)

Saturday, June 30, 2012

Brooklyn Brewery Food Experiment Tour: Cake in Boston

When my friend Neil (aka Chef Diesel) wrote and told me about Brooklyn Brewery's cake competition, I knew I had robe a part of it. No rules, just bake the best cake you can and go out for some fun. I love fun! And cake ;)


The competition was this past Sunday, and it was a blast. My sous chef (husband, haha) and I went for a "cake tasting" theme and brought wine cake bites; Chocolate Pinot Noir and White Riesling. Each had wine flavored buttercream to match. It took a full week of recipe testing and tweaking to get them right but in the end the testing paid off and I brought some pretty tasty little cakes if I do say so myself. Lots of the folks that stopped by the table seemed to love them and came back for seconds and thirds, and I got asked quite a few times if I have a bakery and if I take orders. (No storefront yet, but yes I do take orders!)
White Riesling Cake Bites
Chocolate Pinot Noir Cake Bites
We were Team #1! (sadly didn't win #1, hah!)
Sadly my little cake bites weren't deemed a winner, and neither were the prize-worthy Kahlua Cakes of Neil or the Chocolate Stout Cake Cookies with a Kick by my friend Jamie. Next year we really need to get the masses out to vote for us. The people who recruited tons of friends to show up won the fan-voted prizes by a landslide, but we're over it.. ;) Seriously though, it was a great and I'm so glad I participated.

Chef Diesel
Jamie & Jon
Sous Chef! 
I wasn't being a good blogger and didn't even check out all the tables because I was having fun chatting with everyone that came to mine, but some of the other cakes I saw at the event were:
  • Goat cheese cheesecakes with cherry port savory topping (these won the grand prize. I really liked it!) 
  • Cheesecake with ritz crackers? (another winner.. Didn't taste these) 
  • Some sort of spam pineapple cake (no way would I ever eat spam...J tried one and thought it was bacon. I think he liked it) 
  • Sangria cake (didn't try) 
  • Tequila Sunrise cake (wasn't a fan) 
  • Banana Cake (didn't try) 
The Food Experiment Tour goes nationwide with different themes in each city. If you're not in Boston, checkout their site because the tour could be heading your way! I heard that next years theme for Boston will be something savory, so my thinking cap is on. How can BostonSweetie go savory... I will find a way! I was being selfish and only took pictures of my own table, so those are here. Sorry for the poor quality, it was insanely dark in there! If youre dying for more, check out more at the Food Experiment's Flickr site, they came out great. Last thing- if anyone is interested in the recipe for the wine cakes, let me know in the comments below and I'll be happy to post. BostonSweetie, over and out.


Monday, May 28, 2012

Mini Cake- Small Batch Baking!


And birthday season continues!  Today I want to share a mini birthday cake I made for my Auntie Judy.  I brought this to our family's Memorial Day/Auntie's birthday cookout.  After loads of grilled meats, veggies, salads and fresh corn on the cob, I knew a huge slab of cake wouldn't be on the top of everyone's dessert wish list...a nice bowl of fresh berries with cool whip was more like it!  But, what is a birthday without a little cake?!

For this cake, I didn't want to make a full batch of batter and frosting and have tons of leftovers, so I researched some recipes and adapted a couple from Country Living for this 'small batch' project and the result was perfect.


The following recipe makes a two-layer 4" cake and enough frosting to generously cover the mini-cake.  Both recipes follow steps that are different from what I typically do when baking, which made it fun.  The frosting comes out super creamy and light- I love it!  I didn't like the extra buttery flavor, so added in some vanilla and it was perfect.  I filled this mini-cake with raspberry preserves and it was the perfect summer cake to pair with Grammy's berries and cool whip.


For the finishing decorative touch, I covered the whole cake in old school multi-color sprinkles before piping a "J" for Judy on top. I just love the whimsy of white frosting, bright sprinkles and birthday candles.  Perfect!


Do you have any small-batch baking recipes?  Let me know in the comments below!

Mini vanilla cake (makes one two-layer, 4" cake)
Adapted from this Country Living Basic Vanilla Cake recipe

Need:
  • 3/4 cup flour
  • 3/4 tsp baking powder
  • 1/8 tsp kosher salt
  • 1/2 stick unsalted butter, softened
  • 1/2 cup sugar
  • 1 large egg
  • 1/4 tsp. vanilla extract
  • 1/4 cup skim milk
Do:
  • Pre-heat oven to 400 degrees
  • Spray two 4" cake pans with non-stick spray
  • Mix flour, baking powder and salt in large mixing bowl
  • Beat in the butter, one small spoonful at a time until the mixture looks like coarse sand
  • Beat in the sugar, 1 tablespoon at a time, until the mixture looks like fine, damp sand (NOTE- make sure to scrape down the bowl a few times, especially the bottom.)
  • Beat in the egg
  • Beat in the vanilla and milk on medium-high, until just blended.  Do not overmix!!
  • Pour batter into prepared pans and bake for 30 minutes
  • Cool for 5 minutes in the pan, then completely out of the pans.

Need:
  • 1/4 c. melted unsalted butter
  • 1/4 c. cold unsalted butter, cut into small pieces
  • 1 3/4 c. confectioner's sugar
  • 1/4 tsp. kosher salt
  • 2 tablespoons milk
  • 1 tsp. lemon juice
  • 1 tsp. vanilla extract
Do:
  • Beat the 1/4 c. melted butter with the confectioner's sugar, salt, milk, lemon juice and vanilla in a mixing bowl on medium-high. 
  • Beat in the 1/4 c. cold butter, one small piece at a time, mixing well after each piece.
  • Use immediately, or chill. If you put this in the fridge and use it later, let it sit out for 5-10 minutes, then whip with a little extra milk or vanilla to make it 'fluffy' before using.


Sunday, March 25, 2012

Pineapple Upside Down Cake - Mad Men Season Premiere!

Is anyone else as excited for tonight's 2-hour Mad Men season premiere as my hubby and I are!?  We have been re-watching old episodes for weeks getting pumped up for the newest season.  I cannot wait to see what is next for Don, Betty, Peggy, Roger.  Oh, Roger. 

Image from Vanity Fair
Anyway, to celebrate I figured I would make a 60's-style dessert to enjoy while we watch- Pineapple Upside Down cake! This recipe is un.be.lieve.a.ble.  The old fashioned way is to bake this cake in a cast iron skillet, which I decided to forego for my trusty square pyrex.  Just as retro, if you ask me ;)


The end result is still a silky, perfectly vanilla cake sweetened with pineapple that pairs perfectly with some chocolate chip ice cream.  I've modified a Martha Stewart Pineapple Mango upside-down recipe for this one and it's truly one of my favorite cake recipes.  A must-try, with any fruit baked into the bottom of the dish that you like.


Now pull out your chip 'n dips, channel your inner Peggy (or Peter), and enjoy the show folks!

Need:
  • 1 stick plus 2 tablespoons room temp. unsalted butter
  • 1 can of pineapple rings
  • 1/2 cup packed brown sugar
  • 1/2 tsp. salt
  • 1/4 tsp. baking soda
  • 1/4 tsp. baking powder
  • 1 cup sugar
  • 2 eggs
  • 1 tsp. vanilla extract
  • 1/4 cup plain yogurt
Do:
  1. Preheat oven to 350
  2. Spray an 8 x 8" square pyrex dish with cooking spray
  3. Pull out 7 pineapple rings from the can and put them off to the side, finely chop the remaining rings and let them drain on paper towels
  4. Beat 2 tablespoons of butter with the brown sugar until well mixed and nice and light and airy.  Using a spatula, spread out the butter/brown sugar mixture in the bottom of the greased pan. 
  5. Arrange the pineapple rings and slides however you like on top of the brown sugar.  Fill in any gaps or holes with the chopped pieces.
  6. Mix the flour, salt, baking soda, and baking powder in a medium bowl, set to the side.
  7. Using your mixer, blend the stick of butter with white sugar until well mixed, and nice and light and airy.  
  8. Add the eggs one at a time, and then the vanilla.
  9. Turn the mixer to low and add half of the flour mixture, mix well, then add the yogurt and mix well, and then the rest of the flour until all is well mixed.  Here is the silky, delicious, amazing cake batter.
  10. Spread the batter evenly over the pineapples, and pop the pan in the oven for 50 minutes or until a cake tester comes out clean. 
  11. Let your cake cool for at least 30 minutes, then turn out onto your serving plate, enjoy!

Sunday, February 26, 2012

Happy Birthday, Mum!

February marks the month of "birthday" season in my family.  From now through August, we have at least one birthday every month!  Birthday season = peak baking season, and I kicked it off with this cute little cake for one of my favorite ladies - my Mum!


Mom had asked for just pizza, no cake for her birthday party last night because she wanted to get dessert from Bova's after a few drinks downtown.  No cake? Yeah right!  Instead of doing no cake, I just did a little one.  And yes, we still got late night dessert from Bova's too...best cannoli and lobster tails in the city!


So for mom's mini cake, I decided to go with a yellow theme and tried to have the layers reflect a gradient in color.  The yellow food coloring didn't work out as well as I had hoped...the darker layers look very similar in color, but I think it still came out very pretty.


To match the simple whimsical decorating, I kept the flavors fairly basic- vanilla cake, Bailey's irish cream filling, and vanilla frosting.  Sweet treat for a sweet lady.  Happy Birthday, Mum! Love you!


PS - Yes, you read right...Bailey's Irish Cream filling....this is a little hint to a signature-Stacey treat that I'll detail in an upcoming post.  Get excited!!